Secure phpMyAdmin installation.
Exposing any part of phpMyAdmin is a potential risk. Finding out your password, malicious people could log into your database server, steal data, destroy data, modify data, and more. So, first thing to do: Choose a strong password for your database users, especially for those with extended privileges.
There is a relative simple and secure way to keep anyone but yourself away from your phpMyAdmin installation. Just restrict access to a given IP
address. This may be done by placing a file into your main phpMyAdmin directory. This file should contain something like this:
Order Deny,Allow
Deny from All
Allow from 11.12.13.14
With these settings, the phpMyAdmin page is only accessible, if you connect from IP 11.12.13.14 (you have to use your actual IP, of course).
This works fine, but it presupposes that you have a fixed IP address, and this is often not the case...
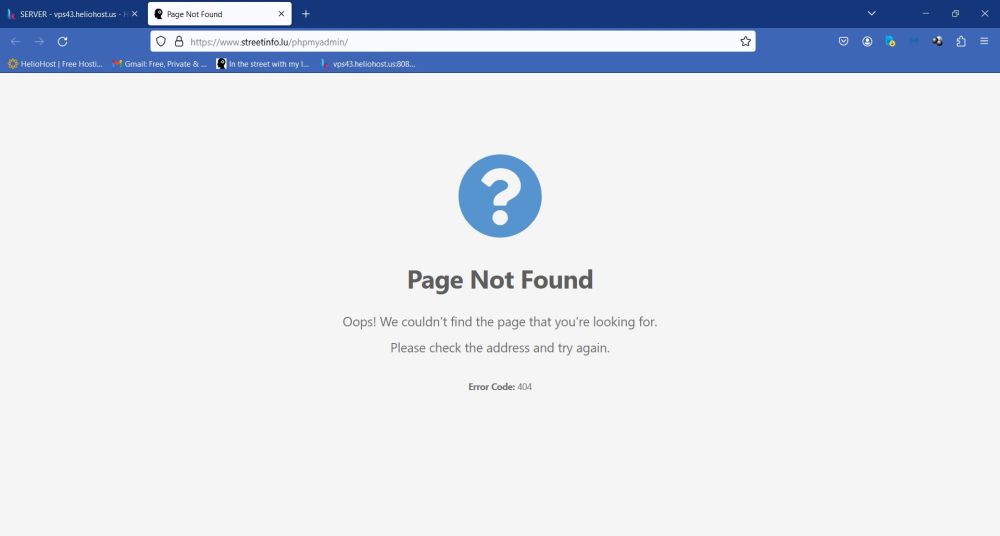
There is, however, another simple and efficient way to keep intruders away from your phpMyAdmin installation. By default, phpMyAdmin is accessed via an alias, defined in the Apache configuration files, and called "phpMyAdmin". This allows to connect to the database server using the URL https://<webserver-full-name>/phpMyAdmin, in my case for example: https://www.streetinfo.lu/phpmyadmin. If we change the phpMyAdmin alias, replacing it by some custom name, the URL mentioned before will lead to an error 404 (not found). And this alone will discourage most hackers to try to intrude your server. And for the others, they have first to guess the alias name and then find your user password.
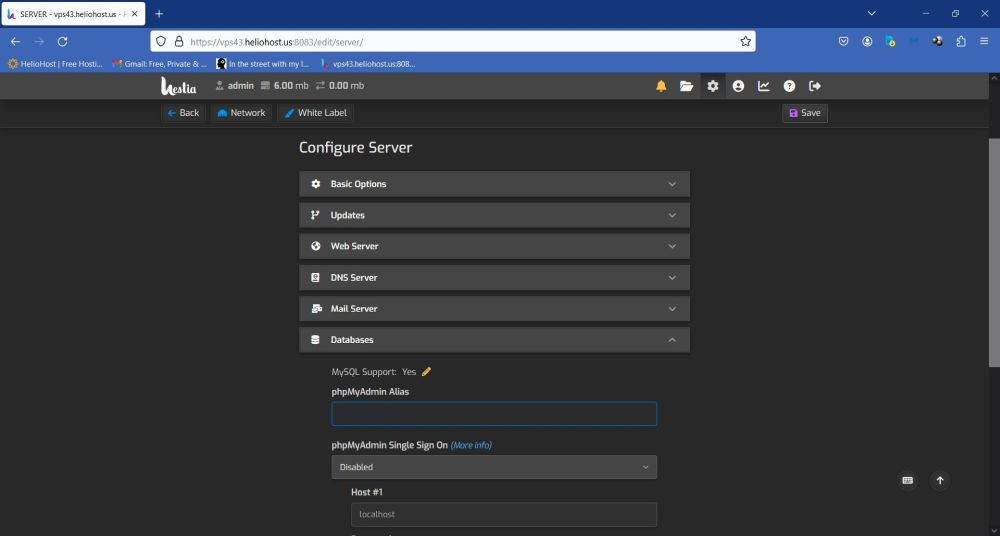
If you run a VPS with Hestia CP as control panel, you can directly change the phpMyAdmin alias in the application's GUI. Logged into Hestia with administrator privileges, click the Settings icon in the main bar and then choose Configuration. The new page, that opens, allows to define some general settings, as well as the configuration of the different servers. Click the Databases bar, and browse downward until you find phpMyAdmin Alias. Replace the default "phpmyadmin" with something less obvious.
 |
The next screenshot shows the "error 404" that I got, when I tried to access phpMyAdmin on my VPS using the default (and now changed) alias.
 |
Supplemental security steps could be to edit the phpMyAdmin configuration file to change the following:
- Disable root access to the database server.
- For setup and library subdirectories, deny access to everyone.
If you find this text helpful, please, support me and this website by signing my guestbook.