Installing a Windows 98 and Windows 95 dual boot.
Installing a dual boot of Windows 98 and Windows 95 is not so easy as installing Windows 2000 and Windows NT on the same computer. In fact:
- As DOS, these operating systems can't be installed on a logical drive, i.e. they must be installed on a primary partition. A disk layout, as used in my Windows 2000/NT tutorial is thus not possible.
- As a difference with Windows 2000/NT, these OS do not include a boot menu feature. They are supposed to be the only operating system available on the computer. Thus, a third party boot manager will be required to boot the two OS.
- The Windows 9x operating systems support one single (visible) primary partition, the active primary, where they are located and from where they are booted from. This means that the boot manger must be capable to change the partition properties, depending on the OS selected. The partition of the OS to be booted has to be set active and the partition of the other OS has to be hidden.
- The Windows 9x operating systems can only be installed on the first primary partition of the disk. I suppose that hiding the partition of the OS installed first before starting the installation of the second one would meet this condition. There is another possibility, as will show this tutorial: rearranging the partitions on the disk, using a third party partition manager.
The dual boot installation, described here, consists in using PowerQuest BootMagic to start Windows 95 or 98 by selecting one or the other from a boot menu. This third party boot manager is capable of starting a BIOS booted operating system like DOS and the Windows and Linux versions, before UEFI boot became the standard, from any partition. It also includes the feature to set the partition of the OS to be booted active, while hiding the partition of the other OS. More complicated to implement than a dual boot based on the Windows bootloader (as for Windows 2000/NT for example), the usage of such a boot manager allows to completely isolate the two OS from each other, making it impossible that some erroneous action on one OS could result in a system file corruption of the other OS. If data exchange between the two OS is wanted, a common data partition (in form of a logical drive) will be needed.
Here the 6 steps necessary to install a Windows 98 and Windows 95 dual boot (please, note that there other possibilities to do so):
- Boot from the Windows 95 boot diskette and run the partitioning tool fdisk to create the primary partition, where this OS should be installed.
- Boot from the Windows 95 boot diskette (because the CD is not bootable) and follow the setup wizard to install Windows 95 onto the newly created partition.
- On Windows 95, install PowerQuest PartitionMagic and use it to create another primary partition before the "Windows 95" partition. PartitionMagic, when creating a new partition, asks if it will contain an operating system and for our Windows 98, it automatically proposes to create a primary partition at the beginning of the disk (what, of course can only be done after moving the "Windows 95" partition towards the end of the disk).
- Boot from the Windows 98 boot floppy (as for Windows 95, the CD isn't bootable) to install Windows 98.
- On Windows 98, install PowerQuest BootMagic, configure it to take the two Windows 9x into its boot menu and write the BootMagic loader into the MBR. When rebooting the computer, BootMagic will start up showing a boot menu, where you can select either Windows 98 or Windows 95.
- If you want data exchange between the two Windows systems (what is desirable, as it will allow you, for example, to indirectly transfer data from a USB 2.0 stick, supported by Windows 98, to Windows 95) and don't already have created a common data partition, you can do it now.
1. Using fdisk to create the "Windows 95" partition.
Be sure that removable devices are the first item in your BIOS boot order. Start MS DOS from the Windows 95 boot diskette. We don't need a CD at this stage, thus, we can choose No CD support, when we are asked for a CD driver. The MS DOS prompt A:\> is displayed: We are in DOS command line now. Type fdisk to start the Windows 95 partitioning tool. On the screen telling us that our harddisk is larger than 512 MB, enter "Y" to the question if we wish to large disk support.
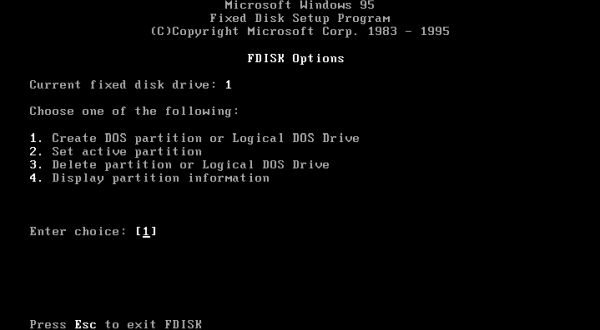
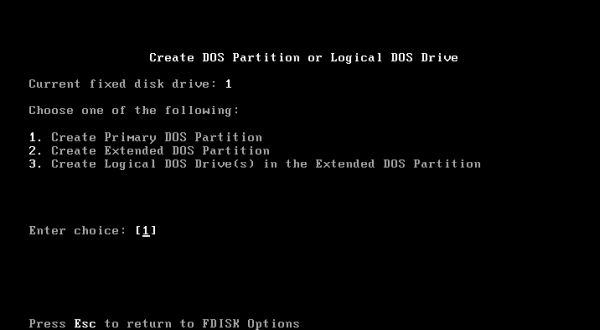
On the first fdisk screen, select to create a DOS partition or a logical drive (option 1; screenshot on the left). On the second screen, select to create a primary DOS partition (option 1; screenshot on the right).
|
|
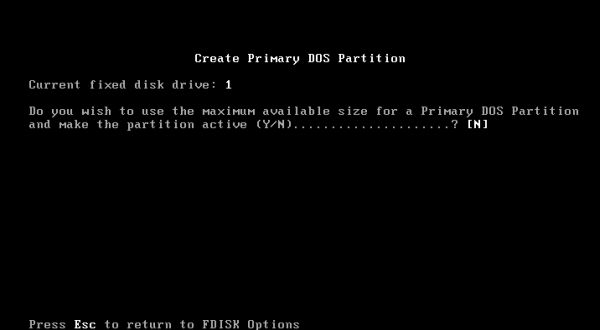
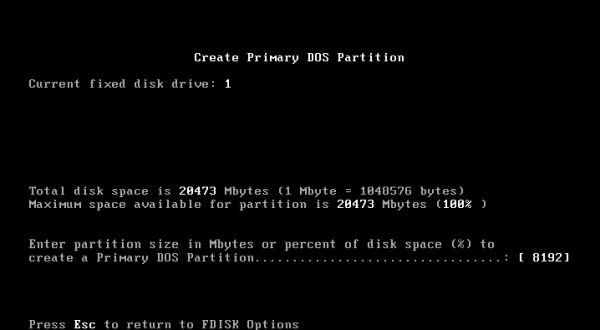
The harddisk of my Windows 98 and Windows 95 virtual machine is 20 GB and I intended to use 8 GB for Windows 98, 8 GB for Windows 95 and the rest (4 GB) for the common data partition. Thus, on the next two fdisk screens, we have to answer "N" to the question if we want to use the maximum available size for the new partition (screenshot on the left) resp. to enter the value of "8192" (8 GB = 8192 MB) as partition size (screenshot on the right).
|
|
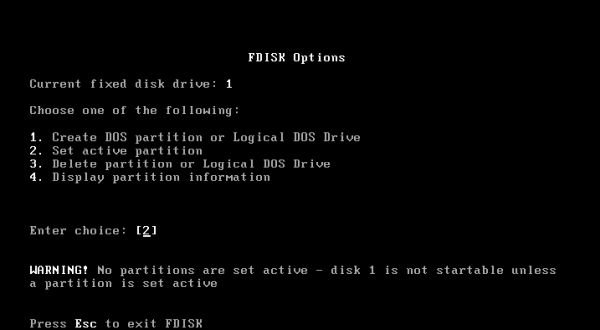
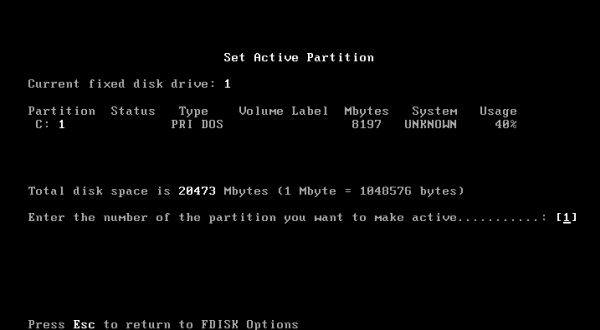
Back to the first fdisk screen, select to set the active partition (screenshot on the left). And on the following screen enter "1" as the number of the partition to be set active (screenshot on the right).
|
|
Harddisk configuration having changed, we have to reboot the computer now. Nearly ready to install Windows 95, but only nearly. Before we can do so, the C: drive must be formatted. In DOS command prompt (after reboot), enter format c:. The format utility will warn you that all data on drive C: will be erased. Enter "Y" to confirm disk formatting.
2. Installation of Windows 95.
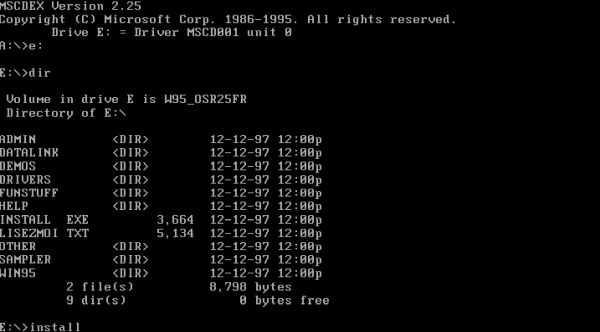
Boot from the Windows 95 boot floppy diskette and choose the adequate CDROM driver (NEC IDE works well on VMware). The program MSCDEX should recognize your CD-drive and assign it a drive letter (I think that this will normally be D:, and not E: as on the screenshot below). In DOS command line, change to the CD drive by entering the CDROM drive letter. If you have a look at the CD content by entering the dir command, you'll see there a program called INSTALL.EXE. Run this program to start Windows 95 setup.
|
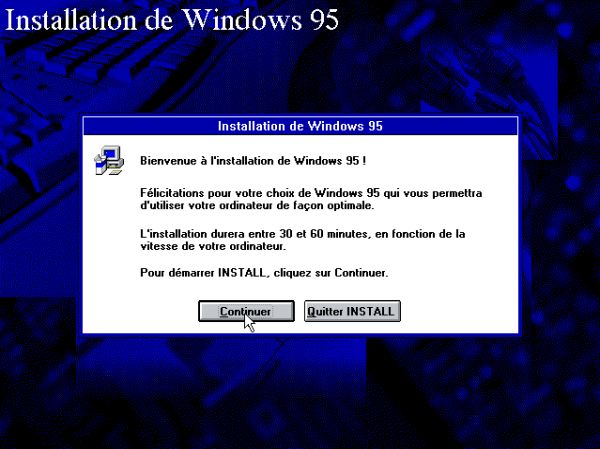
This starts the Windows 95 Setup Wizard (screenshot on the left). Just follow the instructions on the screen. When the installation is completed, you'll have to reset the harddisk as first item in the BIOS boot order (otherwise the system will try to boot from the floppy device, even if there isn't any diskette inserted). The screenshot on the right shows the desktop of my Windows 95C, French language version.
|
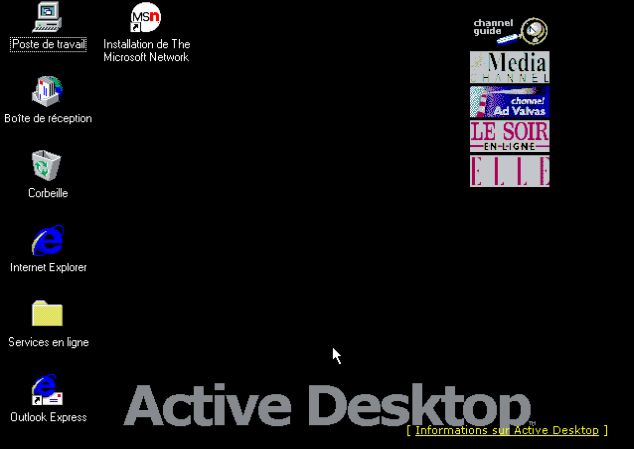
|
3. Preparing the harddisk for the installation of Windows 98.
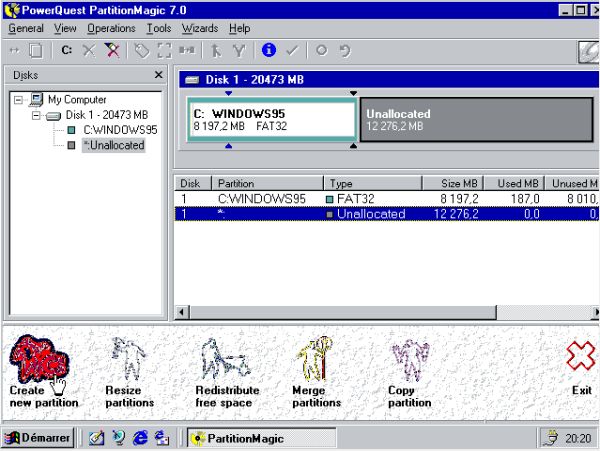
As I said above, the Windows 98 and Windows 95 dual boot installation, described in this tutorial, takes advantage of the powerful features of PowerQuest PartitionMagic to move the "Windows 95" partition towards the end of the disk and to create a second primary partition (for Windows 98) in the unallocated space now available at the begin of the harddisk. PartitionMagic was really famous in the past; I used it myself to "play" with dual boots. Meanwhile, several releases of the application have become abandonware and are freely available on Internet sites like WinWorld.
Install PartitionMagic 7; you'll find the serial number included within the WinWorld download archive. Run the application, select the unallocated space and push the Create new partition button.
|
The PartitionMagic Create new partition wizard starts with the Indicate use for new partition screen, where you are asked if you plan to install an operating system on the new partition. Select the "Yes" checkbox to do so. On the Select operating system screen, choose Windows 95/98/Me and on the Select filesystem type screen, choose the FAT32 filesystem. On the Choose partition type screen, primary partition is the only choice (Windows 9x/Me can't be installed onto a logical drive!).
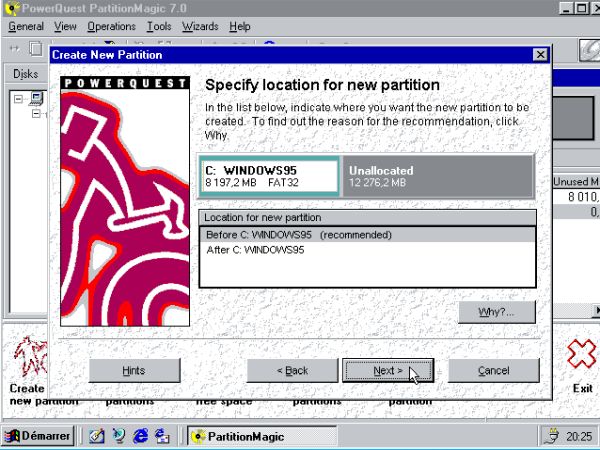
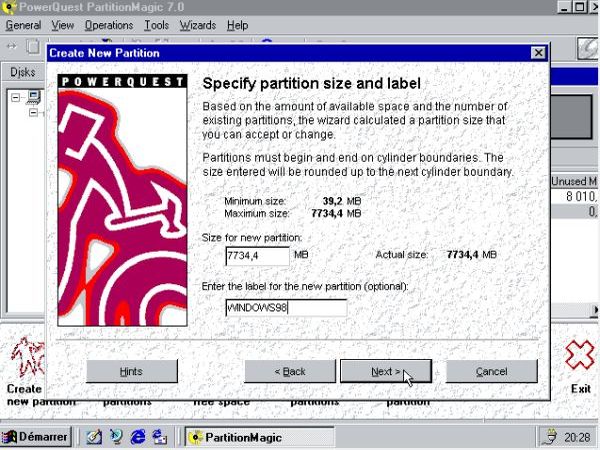
On the next two screens, you have to specify the Location of the new partition (screenshot on the left) and the Size of the new partition (screenshot on the right). Choose to create the partition before C: WINDOWS95. As mentioned above, I intended to use 8 GB for Windows 98 and the resting space on the disk for a common data partition. However, PowerQuest indicates the maximum size for the new partition to be 7734.4 MB (some 7.5 GB). No idea why. Perhaps, because otherwise it would not be possible to boot Windows 95 (that will be located on the second partition, when partitioning operations are done)? Anyway, use a size of 7734.4 MB and (optionally) label it WINDOWS98.
|
|
Remains to set the new partition active (Install your new operating system screen; screenshot on the left) and to finish the wizard (Confirm creation of new partition screen; screenshot on the right).
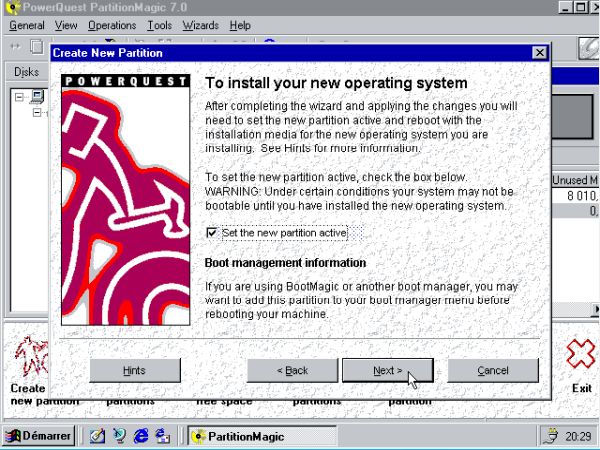
|
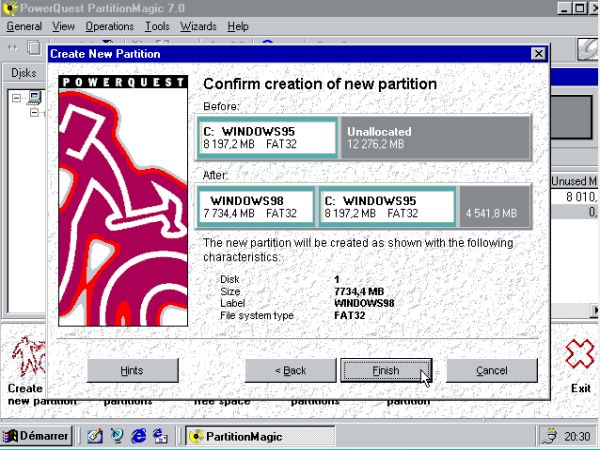
|
As the C: partition (containing Windows 95) has to be moved on the disk, it's obvious, that this can't be done while Windows 95 is running. PartitionMagic informs you that you'll have to go into DOS mode to perform the partitioning operations and that Windows will be restarted when all is done. The system restarts, booting into the PartitionMagic Pre-OS Boot Application (screenshot on the left), that will execute the DOS commands included in a file called PQ_BATCH.PQB (saved before in C:\Windows\System). All pending partitioning operations will be executed this way: moving the "Windows 95" partition, creating the "Windows 98" partition, setting the "Windows 98" partition active. Then, the system is rebooted (screenshot on the right). No Windows or whatever else showing up, just the error message Invalid system disk. This message actually tells us that there is no diskette in the floppy drive. In fact, the hard disk being the first boot device, has an active partition, that, for the moment, doesn't contain anything at all; the CD-device, second in the list, is ignored when there is no CDROM inserted, and the third boot device is the floppy...
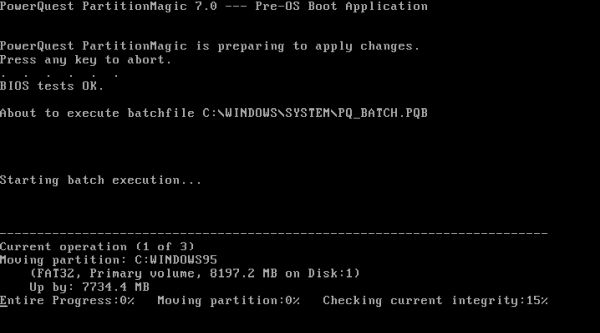
|
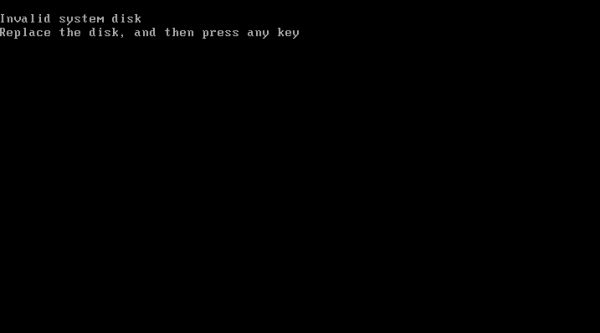
|
4. Installation of Windows 98.
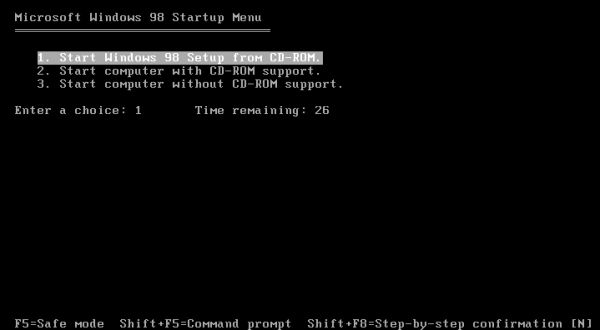
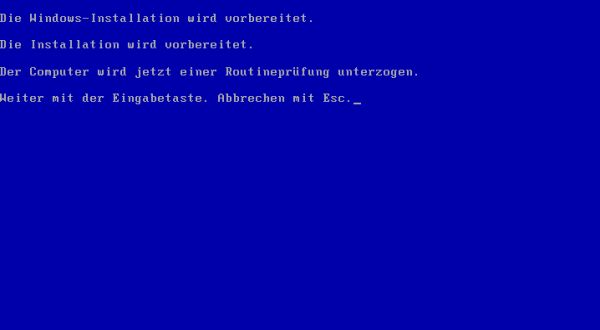
As for Windows 95, the Windows 98 CDROM is not bootable and you'll have to use a Windows 98 boot diskette to boot the system. As a difference with Windows 95, the boot menu includes the entry Start Windows 98 setup from CDROM (screenshot on the left). After the Welcome screen, the setup program tells you, that the installation is prepared, by performing an analysis of the computer's configuration (screenshot on the right).
|
|
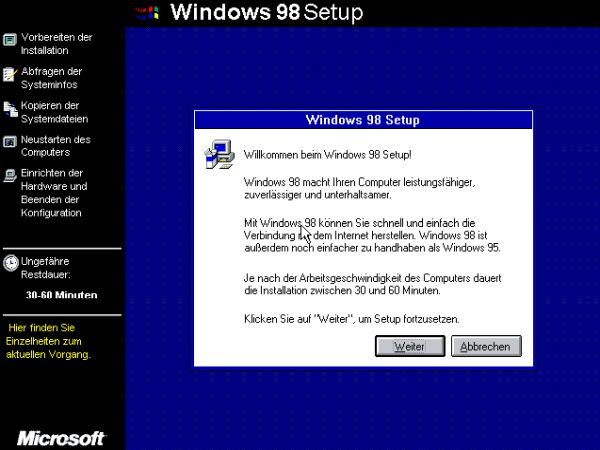
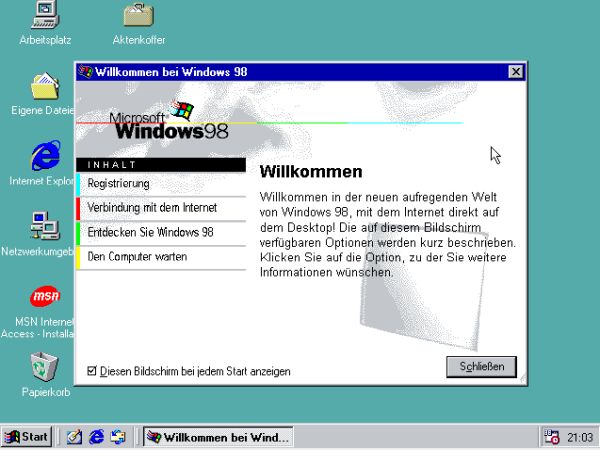
As the computer harddisk actually contains a primary partition, that is set active, setup of Windows 98 is directly started. Intended to be the only operating system on the machine, the installation program does not care if this partition contains any other OS and will (without any warning) overwrite all data on the partition. The Windows 98 setup wizard is started (screenshot on the left); just follow the instructions on the screen. The screenshot on the right shows the desktop of my Windows 98 SE, German language version.
|
|
5. Dual boot using PowerQuest BootMagic.
After installation is complete, make sure that the BIOS boot order is set to 1. harddisk, 2. CD-drive, 3. removable devices. When turning on the computer, it will now start Windows 98. Simply because the Windows 98 setup program installed its bootloader into the MBR. Install PartitionMagic 7 (included on the same CDROM as PartitionMagic 7, installed before on Windows 95) and run it.
The PowerQuest applications include detailed documentation, thus, if you want to learn about all possibilities to configure the dual boot, please, have a look at those help texts. If I say that, instead of giving more details here myself, it's simply because, if you aren't really interested in these details, you haven't to worry about. In fact, the dual boot of Windows 98 and Windows 95 is automatically configured as it should be: BootMagic creates a boot menu with an item for the two operating systems, hides the not-used OS partition from the booted OS, and installs the BootMagic loader into the MBR.
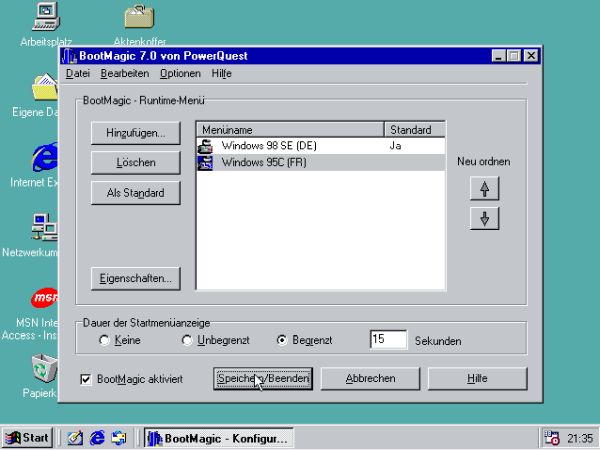
The screenshot on the left shows the main BootMagic screen with the boot menu as it will be displayed on my system when the computer is turned on. Configuration adaptions, that you can do here:
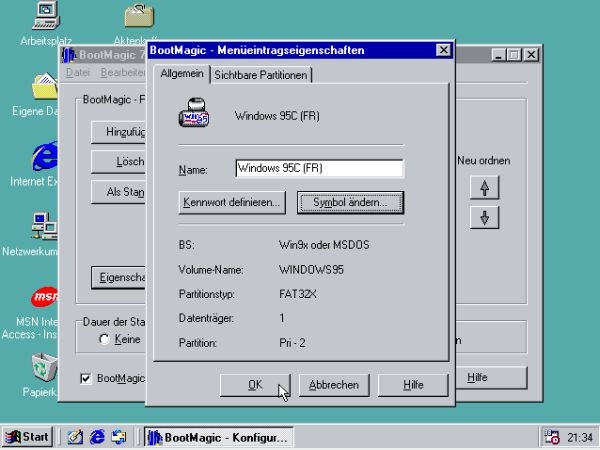
- Selecting a boot entry and pushing the Properties ("Eigenschaften" in German) button to change the configuration for the corresponding OS (screenshot on the right for Windows 95): Changing the text to be displayed as boot menu item, changing the icon to be used with this boot menu item ("Symbol ändern"), setting a password, that has to be entered to boot this OS ("Kennwort definieren"). All this options are available on the General ("Allgemein" in German) tab. The Visible partitions ("Sichtbare Partitionen" in German) tab is for experts only! It allows to define what partitions a given OS will be able to see and which will be hidden to it (cf. further down).
- Defining the order of the boot menu items (using the up and down arrows) and defining the OS to be booted by default ("Als Standard" in German).
- Setting a timeout value, i.e. the number of seconds the boot menu is displayed, before the default OS is booted.
- And finally, selecting the BootMagic active ("BootMagic aktiviert") checkbox to install BootMagic into the MBR.
|
|
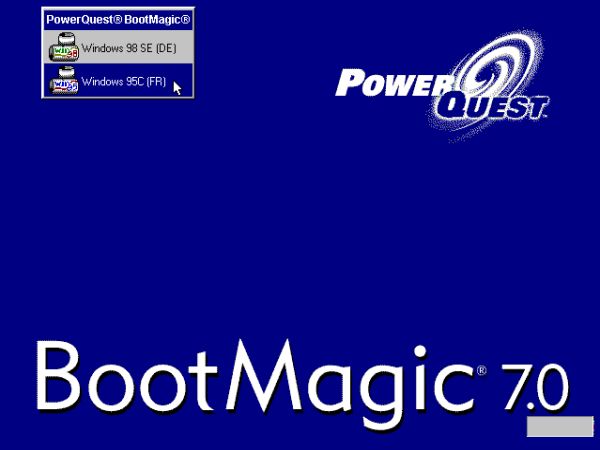
After having configured BootMagic as described above and written its bootloader into the MBR, the computer starts up with the BootMagic boot menu, as shown on the following screenshot. You can use the keyboard or the mouse to select if Windows 98 or Windows 95 is booted.
|
6. Creating a common data partition.
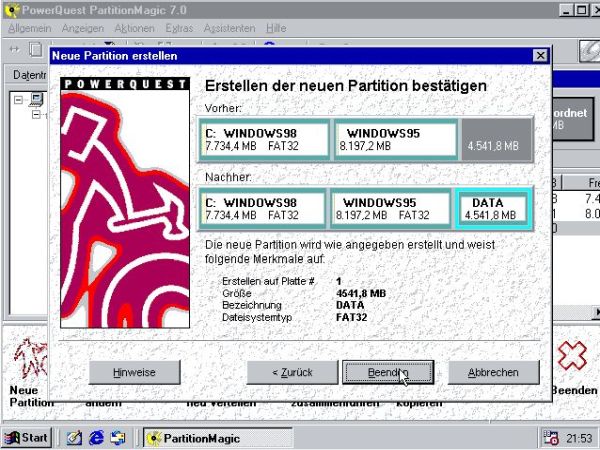
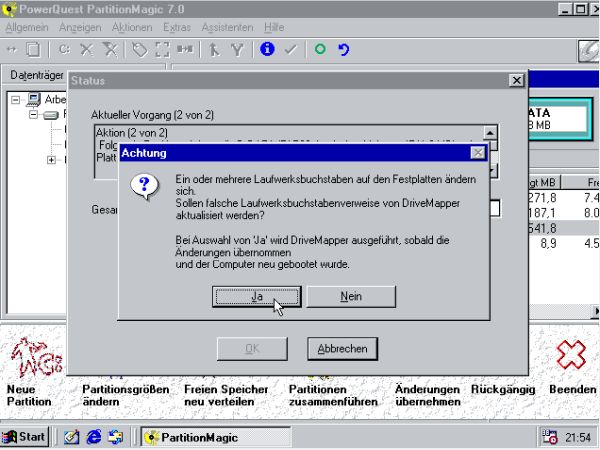
The simplest way to exchange data between our Windows 98 and Windows 95 systems consists in creating a common data partition. We'll create it now, in the unallocated space remaining on the harddisk and using PartitionMagic 7, that I also installed on Windows 98. It is mandatory to create this partition as a logical drive and best to create it behind the "Windows 95" partition. PartitionMagic will ask from which partition space should be subtracted to create the new partition. This seems a little bit intriguing. But, just select the "Windows 95" partition; nothing will be subtracted anywhere. As for the other two partitions, the FAT32 filesystem has to be used. And as partition size, choose the amount of unallocated space available on the disk, in our case 4541.8 MB, and (optionally) label it "DATA". The following screenshot shows the final step of the data partition creation.
|
The creation of this new partition will have effects on the drive letters used by Windows. In fact, Windows assigns drive letters first to the local drives, i.e. the harddisk(s) and then only to the removable devices, such as CD-drives and USB devices (the exception are floppy drives, that always get drive letters A: and B: assigned). In our case, this means that the "Data" partition will be assigned drive letter D:, actually used by the CD-drive, that, in the new configuration, will get drive letter E:. This may cause some issues: Any application, accessing a file path, including a hard coded CD-drive letter, will generate an error, when launched. This is in particular true, if you install supplementary software from the Windows CD, that will search for files on drive D:. Not really a big deal, because you will have the possibility to manually enter a path: Just replacing D: by E: would solve the problem.
I really liked the PowerQuest products, because they were really build with the care to allow the users an easily understandable and smooth usage (as a difference with today's software, where lots of efforts are spent to spy by one way or another on the users). One example is the PartitionMagic screen, where users are asked if the new partition to be created should or not contain an operating system, and the application, based on the user's answer, automatically chooses the optimal settings. Another example is DriveMapper, installed together with PartitionMagic, and that is automatically executed in a case like the creation of our data partition. What does it do? It searches the computer for applications, that directly reference the D: drive and replaces them with E:. That's user-friendly, isn't it?
|
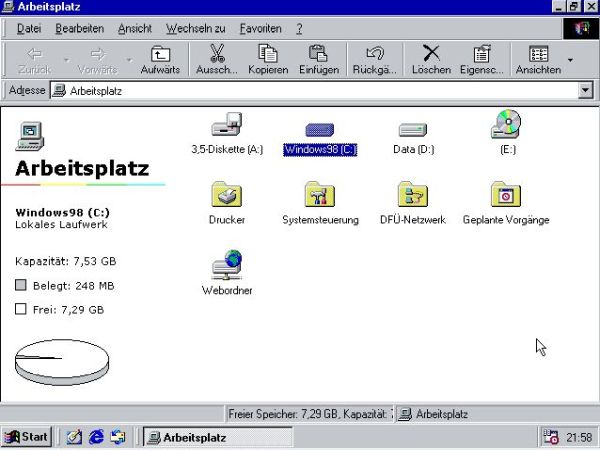
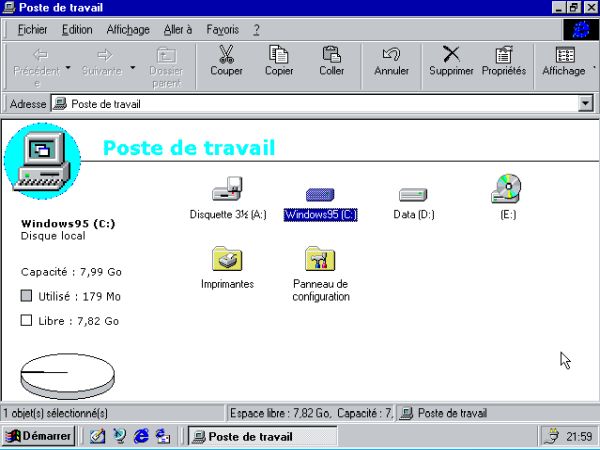
To terminate this rather long tutorial, lets have a look at Windows Explorer on both systems. At first sight, it's exactly the same, with presence of drives A:, C:, D: and E:. However, drive C: is not drive C:! On Windows 98, drive C: is the first partition of the disk (containing the Windows 98 OS) and on Windows 95, drive C: is the second partition on the disk (containing the Windows 95 OS). Situation that is very different from the one described in the Installing a Windows 2000 and Windows NT dual boot tutorial!
|
|
Note: Another nice feature of the PowerQuest products is that they allow to create bootable floppy disks. This is true for PartitionMagic as well as for BootMagic. In the first case, it allows you to start the partitioning application from floppy diskette, with full possibility to change the harddisk partitions. In the second case, you can boot from floppy disk (if, for one reason or another, booting from harddisk fails), with full access to the configuration of the PowerQuest bootloader.
If you find this text helpful, please, support me and this website by signing my guestbook.