Expanding a VMware virtual disk.
When you create a virtual machine, you have not only to decide how many processors and RAM you want to give to it, but you must also define the size of the virtual disk. Virtual disks are actually files on the host, either on the internal disk drive, or on some external storage device, as for example an external SSD (you can also use a HDD, but with modern operating systems, this will drastically reduce the performance of the VM). Virtual disks are by default created in a way, that they start as a small disk file and then grow, accordingly to the quantity of data, the guest operating system and the applications running on it write to the virtual disk. Thus, there is no problem to create a virtual disk, that is "to large" for the OS and applications, that you intend to install. It's always better than having one that is too small. There is a feature included with VMware Workstation, that allows to increase the size of a virtual disk, but disk expansion is a complex and time-consuming process.
Some important facts, that you should know about before expanding a VMware virtual disk:
- A virtual disk to be expanded cannot have snapshots, so you'll have to delete all snapshots before you can change the disk's size.
- Expanding a virtual disk is a very complex process that may take a very long time to complete (for a large virtual disk this may be several hours).
- Expanding a virtual disk changes the disk drive's size but does not change the actual partition layout. Thus, after expanding the virtual disk, you'll have to repartition the disk on the guest operating system.
- Disk expansion (on the host) and repartitioning (on the guest) are both very critical operations. If either of them fails, your virtual machine will probably no longer work. Thus: Back up the virtual machine's files before you proceed!
This help text shows, how I expanded the disk of my Windows 8.1 (French version) VMware virtual machine. Some remarks:
- On modern Windows systems, such as Windows 8.1, disk repartitioning may be done from within Disk Management if the partition that will get the supplementary space on the disk is the only one, or the last one on the disk drive. If this is not the case, a third-party disk partitioning application is required.
- On older Windows systems, there is no repartitioning feature included and you'll always need to install a third-party disk partitioning application.
- On Linux systems, the simplest way to repartition a disk is to use gParted. If this partition utility isn't included with your Linux distribution, you can install it with your package installer application.
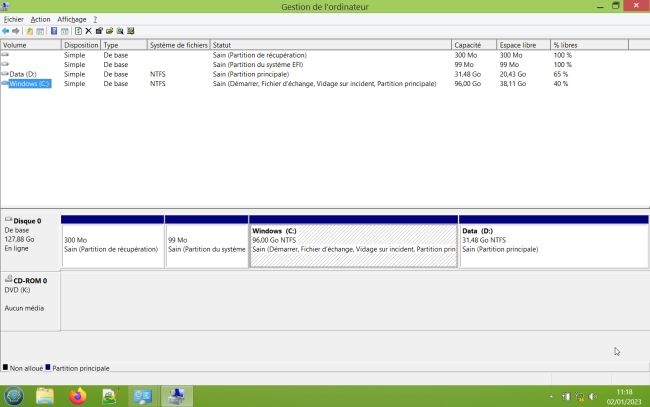
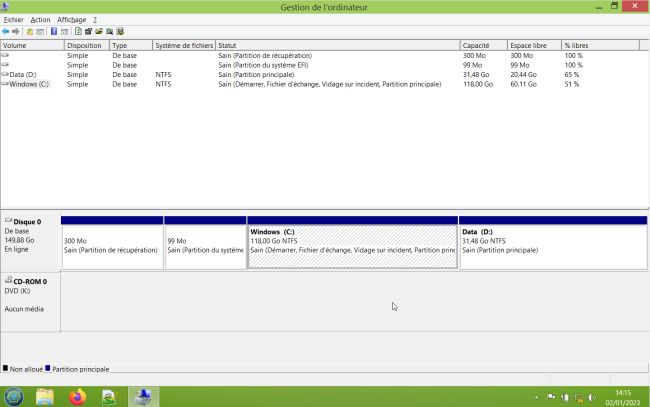
The screenshots below show the disk layout in Windows 8.1 before (left) and after (right) I expanded the VMware virtual disk and applied the partition changes. As you can see, the C: partition, that has been extended, is not located at the end of the disk, but before the D: partition. The Extend volume feature of Windows Disk Management can thus not be used to extend the partition, but a special partitioning tool is required. In this tutorial, I use AOMEI Partition Assistant Standard, that is free of charge for non commercial usage. Another well known free Windows partitioning application is MiniTool Partition Wizard.
|
|
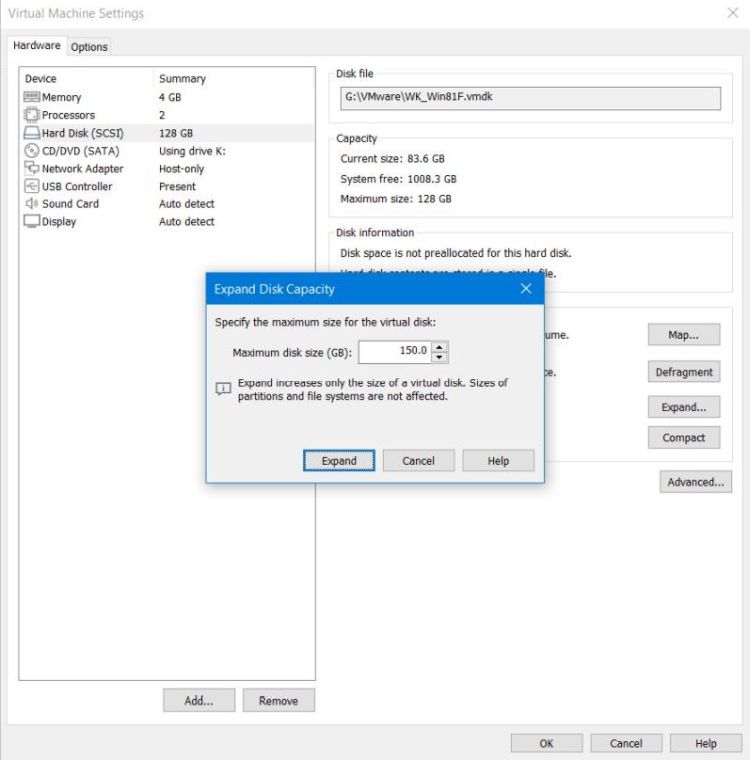
So, after backup of the virtual machine's files and deletion of all snapshots, open the virtual disk properties in VMware Workstation and push the Expand... button. A dialog box opens, and you'll have to enter the new virtual disk size. In my case, I want to change the size from 128 GB to 150 GB.
 |
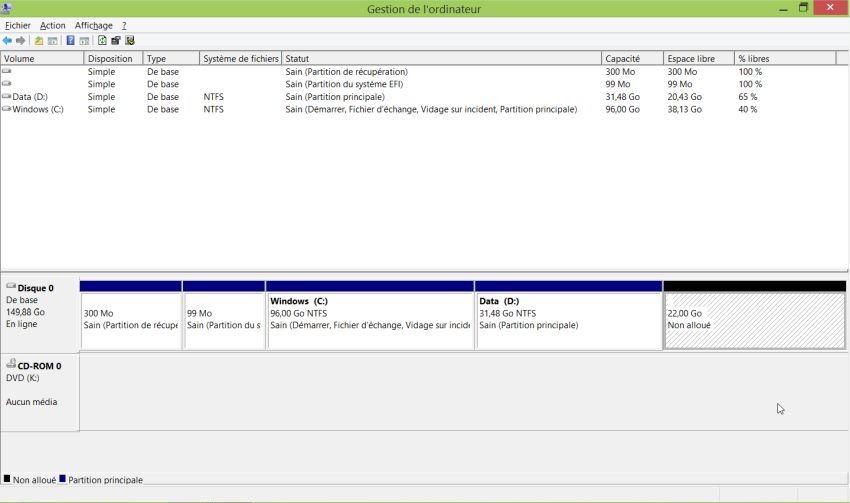
As I said above, the expansion process may take several hours. When done, VMware Workstation remembers you that you'll have to repartition the disk in the guest operating system. The screenshot shows my Windows 8.1 disk layout in Disk Management after the virtual disk size has been increased to 150 GB. You can see that VMware Workstation has added the disk extend as unallocated space at the end of the disk.
 |
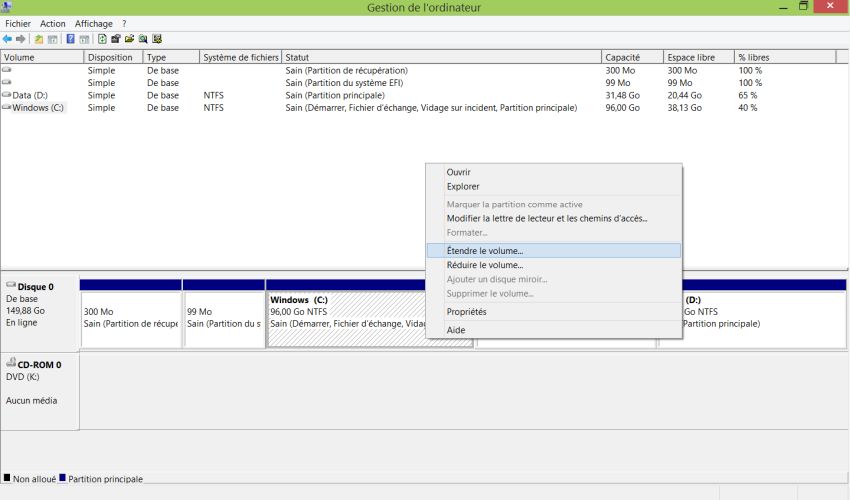
If we wanted to expand the D: partition or if we wanted to expand C; on a system, where there is no D:, we could simply use the Extend volume feature of Disk Management. In this case, however, if you right-click the volume, you'll see in the opening context menu that this command is dimmed: A basic volume can only be extended if there is free space immediately after it.
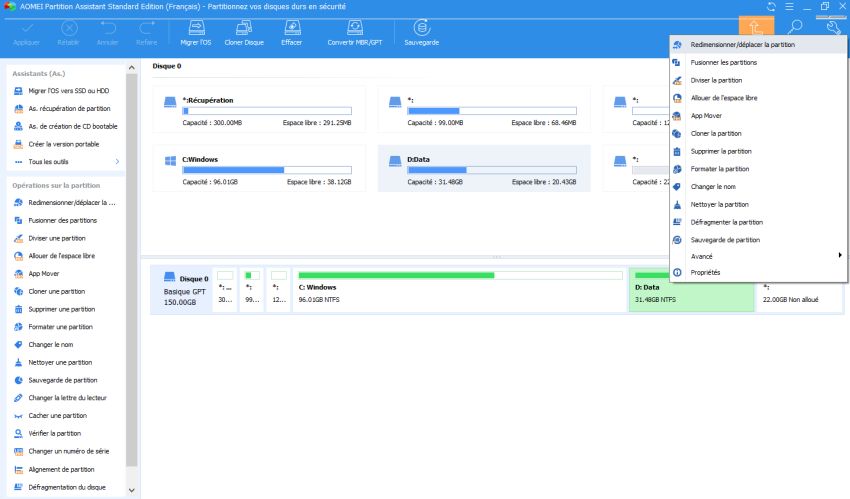
So, we'll have to move the D: partition to the end of the disk, an operation that is not part of the Windows 8.1 Disk Management features. A third-party partitioning application is needed. The screenshot shows the disk layout in the French version of AOMEI Partition Assistant Standard, with the context menu for the D: partition opened and the Resize/Move partition (French: "Redimensionner/déplacer la partition") selected.
 |
Moving a partition with AOMEI Partition Assistant is quite easy: Position the mouse over the partition to move and when the mouse cursor has changed to a cross, drag the partition to the location on the disk, where you want (in our case to the end of the disk).
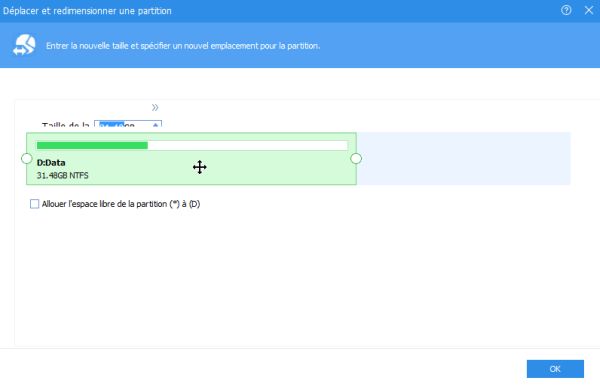 |
Push the OK button to come back to the main screen and choose Apply (French: "Appliquer") from the command bar. In the next window, push the Execute button, what leads you to a window, where you have to decide, how the operation should be performed.
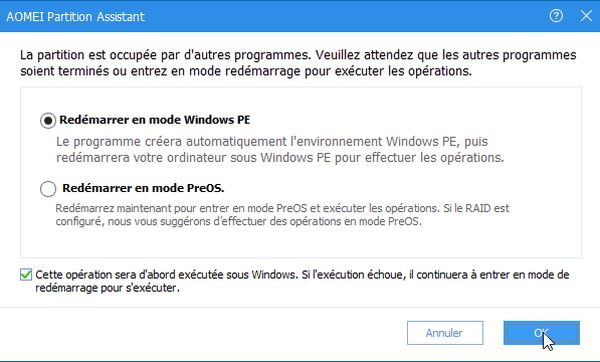 |
What's this about? Moving a partition is a complex and critical operation. In fact all partition data has to be moved to a new location on the disk and if the disk is active in the sense that Windows or some applications are writing data to files on the partition, moving the data could not be safe or even not be possible. That's why AOMEI Partition Assistant gives you the possibility to execute the operation not on your running Windows system, but (after reboot) under WindowsPE (a small operating system, that is part of the system's recovery environment, used to install, deploy, and repair Windows desktop editions), or in PreOS Mode (a simple boot environment, provided by AOMEI, and allowing to run all partition operations completely independently of Windows, thus for example also working when there is no recovery environment available or if AOMEI cannot detect it). Moving a system partition (like the C: drive) will always need to be done in Partition Assistant Restart Mode. For our D: partition, containing only user data, the operation might succeed on the running Windows system. That's why there is the checkbox, that gives you the possibility to first try to run the operation as a regular Windows application, and only, if this fails, use the Partition Assistant Restart Mode.
In my case, moving the D: partition to the end of the disk witout rebooting worked fine. The operation took some 8 minutes for 11 GB of data.
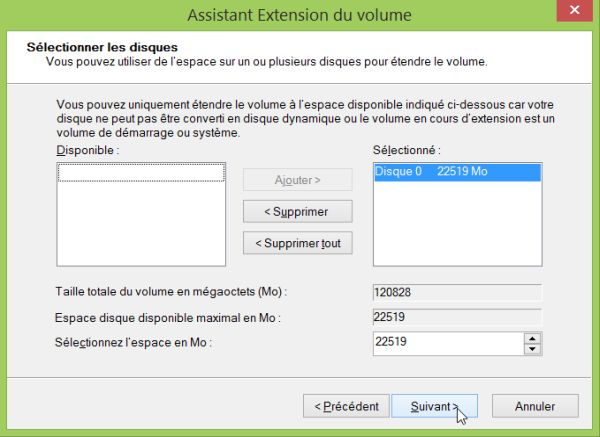
After the operation is terminated, we can resize our C: partition by extending it onto the free space that is now located immediately behind itself. This means, that we don't need a special tool to do it, but can use the Extend volume (French: "Étendre le volume") feature of Windows 8.1 Disk Management.
 |
This wizard based operation is easy to realize: Just select the disk that contains the unallocated space (the disk will already be selected if there is only one) and enter the size (number of MB), that should be added to the partition. In our case, nothing to change in the extension window, as the input field with the size to be added is filled by default with the total value of unallocated space available, and that is exactly what we want.
 |
If you find this text helpful, please, support me and this website by signing my guestbook.