Installing antivirus software on macOS.
"Wondering if you need antivirus for Mac? Macs can get viruses and there are protections in macOS to keep you safe – but it's wise to extend the protection", you can read in a MacWorld article entitled Macs can get viruses, but do Macs need antivirus software? There are measures put in place by Apple at the operating system level that should protect Mac users from the worst malware threats. These built-in security features make attacking a Mac particularly challenging. Gatekeeper checks that any app you attempt to open or install has come from a certified developer. XProtect inspects every app for malware. "However, as good as these protections are, there have been occasions when malware has gotten on to Macs, and times when Apple hasn’t responded as quickly to a threat as Mac users might hope.", they write in the article mentioned above. Thus, it is recommendable to install some third-party antivirus software on macOS.
As for other operating systems, there are commercial and free antivirus available for macOS. MacWorld has chosen Intego Mac Internet Security X9 as best security suite 2023 (it includes an antivirus, a firewall, plus other tools). The favorites of PCMag for 2023 are Bitdefender Antivirus for Mac and Norton 360 Deluxe for Mac, both scoring with 4.5 ("outstanding"). All these products are commercial. There is a free edition of Bitdefender Antivirus; it scores 4.0 ("excellent") at PCMag. I gave Avira Free Security for Mac a try. "Avira Free Security for Mac does a good job (verified by independent testing labs) at no cost", you can read in the PCMag article Avira Free Security for Mac Review (October 2022), where the application is rated 3.5 ("good").
For several years, I use Malwarebytes Free as a secondary virus scanner (the free edition is an on demand scanner only, thus does not includes real time protection) on my Windows PCs. There is a free edition of Malwarebytes for macOS, too, and I installed it aside my primary antivirus, as I use to do on Windows. In the PCMag article Malwarebytes Free Review (April 2021) it is rated 4.0 ("excellent").
Installation of Avira Free Security.
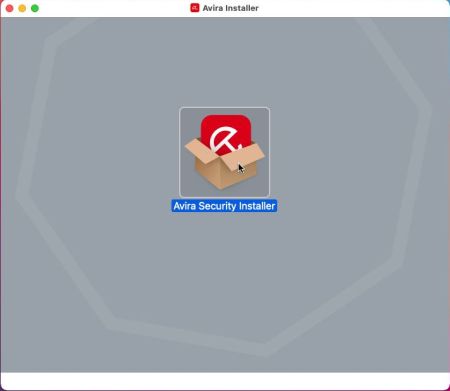
You can download Avira Free Security from the Avira website. The download is a DMG file, containing the installer. Just double-click this file (in my case "Avira Installer_en_fass0_1199938350-1685542285__pavmws.dmg"); the setup program is automatically started.
 |
After you have accepted the license and confirmed the installation, the setup program starts to download the app components; thus an Internet connection is required to install the antivirus. When the download is finished, the installation is launched; you'll have to enter your password to proceed.
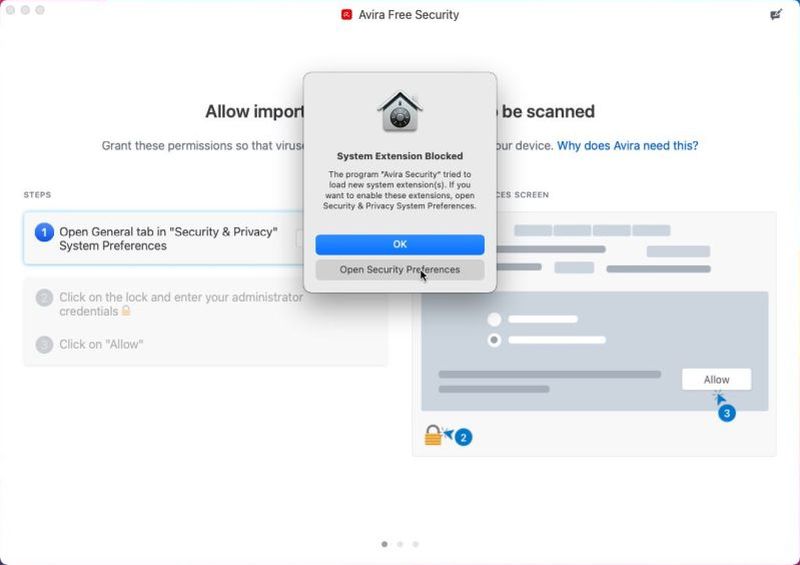
At the beginning of this tutorial, I mentioned Gatekeeper. As the antivirus is not part of the applications known by this "guardian angel", a pop-up tells you that a system extension has been blocked. You must explicitly allow the usage of Avira in Security & Privacy. You can access the corresponding settings directly from the pop-up window, by pushing the Open Security Preferences button.
 |
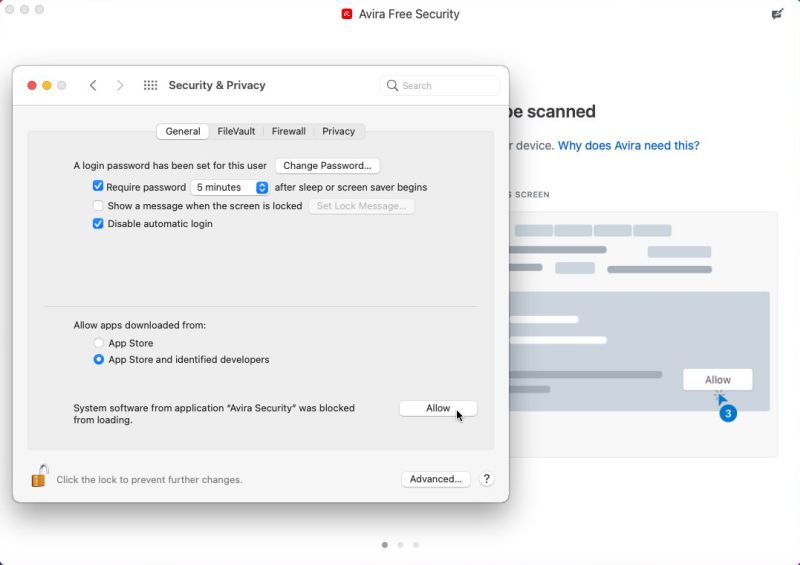
In the Security & Privacy window, click the lock icon at the bottom-left corner to make modifications of the settings possible. In the lower part of the Window, you can see the message "System software from application Avira Security was blocked". At the right of the message, you find the Allow button, that you have to push to explicitly allow Avira to run on your Mac.
 |
Avira Free Security is now allowed to run on your Mac, but there is another special authorization the app needs: In order to scan system files it needs access to the whole harddisk content. This is the meaning of the Allow important areas of your Mac to be scanned window, with which the Avira setup program continues. The corresponding settings are in Security & Privacy again, and you can use the Open Privacy button in the setup window to access them.
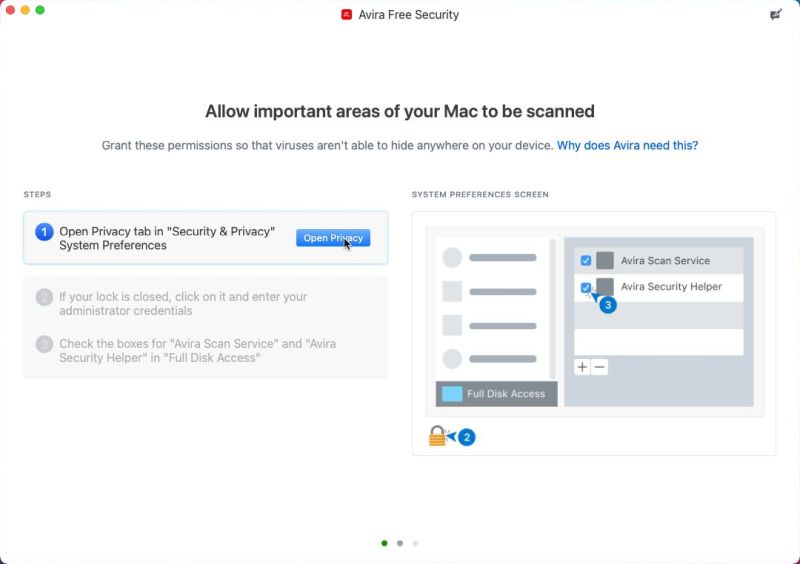 |
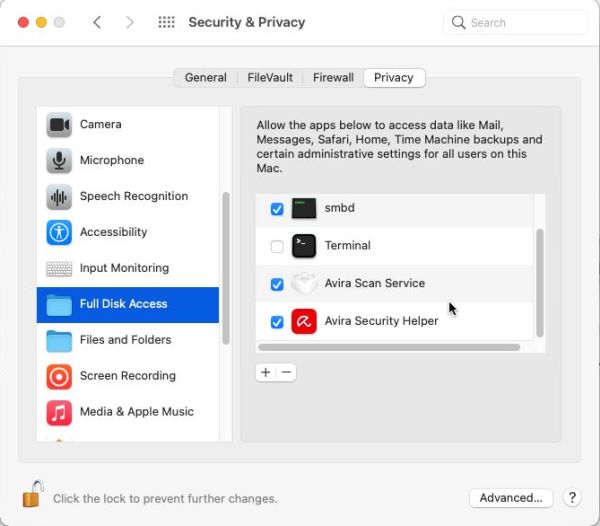
In the Privacy tab of Security & Privacy, be sure that Full Disk Access is selected in the left pane. To allow Avira to scan all files, select the checkboxes of Avira Scan Service and Avira Security Helper.
 |
Avira setup has meanwhile finished and the app GUI is started with the Welcome page, where you find a button to start Smart Scan. Smart Scan primarily consists of a virus scan of the "most important" PC areas, but also includes other tasks: the also free search for tracking cookies, and the non-free USB protection, Email monitoring and disk clean-up. The screenshot below shows the results of my first Smart Scan. I just wonder what Avira actually scanned, because it took just some seconds (?).
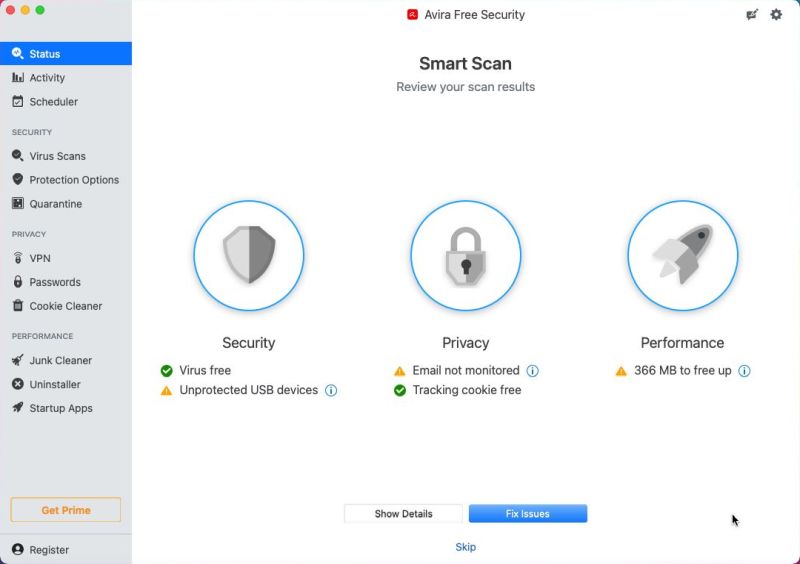 |
You can use the Show details button for more information about the actual issues. To fix all actual problems with one click, push the Fix issues button. If you do so, some of the junk is cleaned up, nothing is done concerning the USB devices and Email monitoring. If you push the How to fix button, that is displayed with the not executed tasks, a window with the prices of the available non-free Avira editions will be displayed. Note, that you have the right on a 60 days free trial of Avira Prime. I did not try this out...
Installation of Malwarebytes for Mac.
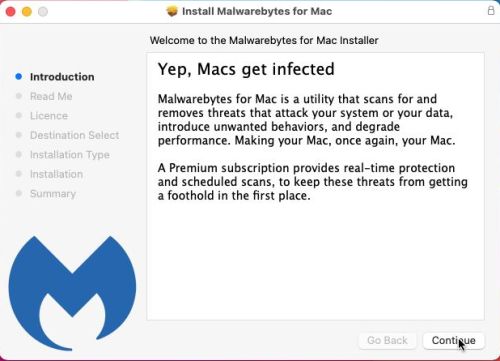
You can download Malwarebytes for Mac from the Malwarebytes website. The download is a PKG file (macOS package). Double-click the file (in my case "Malwarebytes-Mac-4.19.14.4978.pkg"); the setup wizard is started.
 |
After the display of some information about the actual version and your agreement to the terms of the license, you can start the installation by pushing the Install button (you have also the possibility to change the install location). You will be asked for your password, before you may proceed. The installation is finished and the configuration of the app is launched without that Gatekeeper tries to stop its execution. I suppose that Malwarebytes for Mac has a signature that identifies it as a program that is allowed to run on macOS.
 |
First, you have to select if you install Malwarebytes on a personal or a work computer, then you are asked to buy a license for the Premium edition (click Maybe later to continue). In the next Window, the app is started. In fact, you start a 14-day trial of the Premium version (I never used this, and I'll show further down in the text how to deactivate the trial and, by that, get a 100% free app).
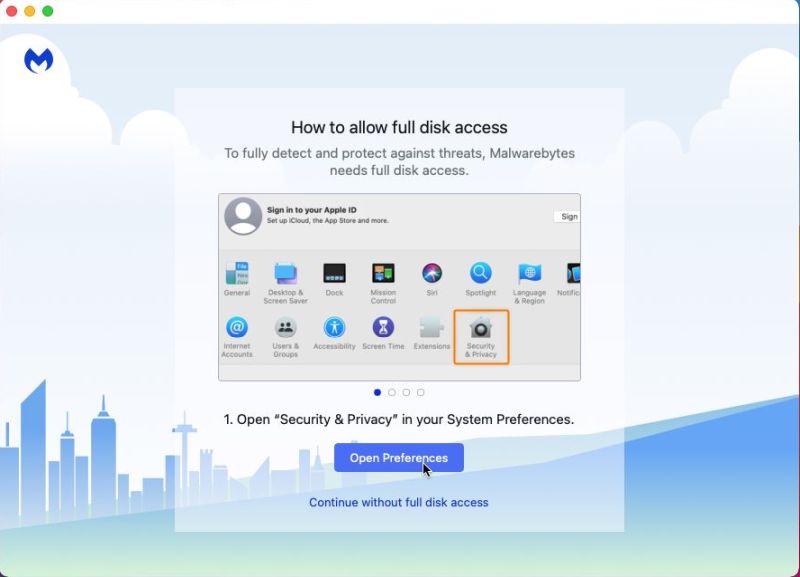
In fact, there remains one thing to do, before starting the app: In order to scan system files, Malwarebytes needs access to the whole harddisk content. This is the meaning of the How to allow full disk access windows. The corresponding settings are in Security & Privacy and you can use the Open Preferences button in the setup window to access them.
 |
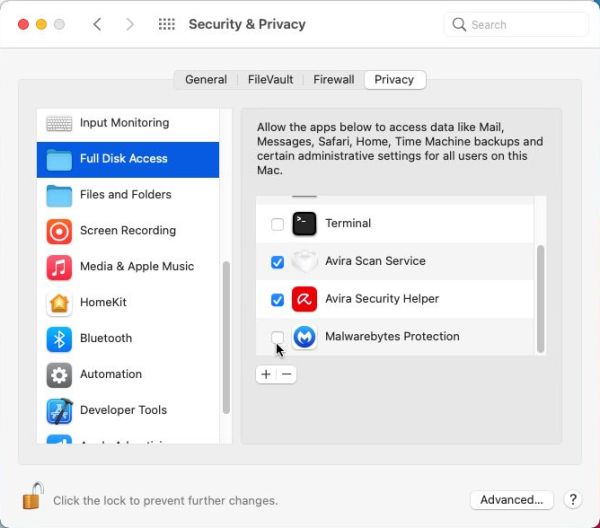
In the Privacy tab of Security & Privacy, click the lock icon at the bottom-left corner of the window to make modifications of the settings possible. Be sure that Full Disk Access is selected in the left pane. To allow Malwarebytes to scan all files, select the checkbox of Malwarebytes Protection.
 |
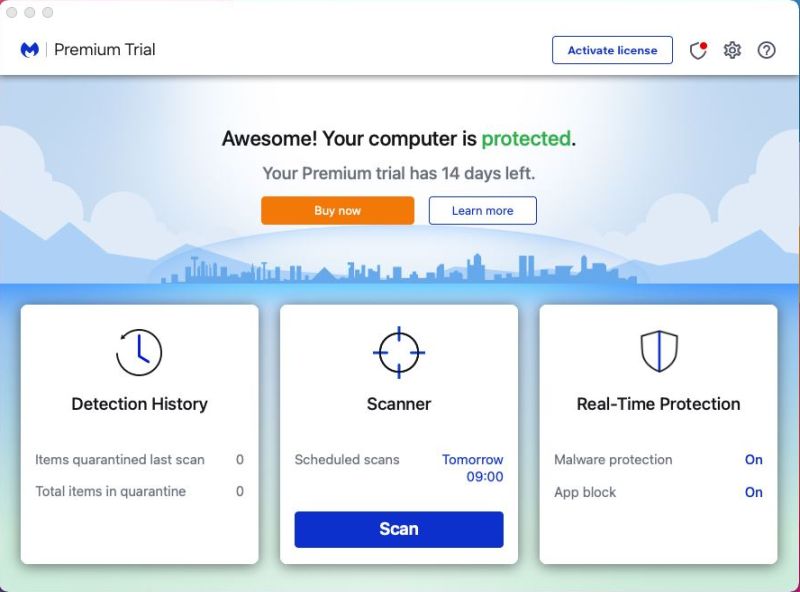
The Malwarebytes configuration wizard has not continued during this time. Push the Next button to get to the next window explaining full disk access, and finally the Done button, when the last of these windows is reached. The Malwarebytes GUI shows now up. On the screenshot below, you can see that real-time protection and scheduled scans are enabled (because we're actually running the Premium trial).
 |
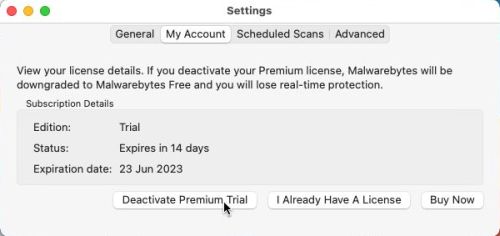
If you want to disable the 14-day trial, open Settings, and in the My Account tab, click the Deactivate Premium Trial button.
 |
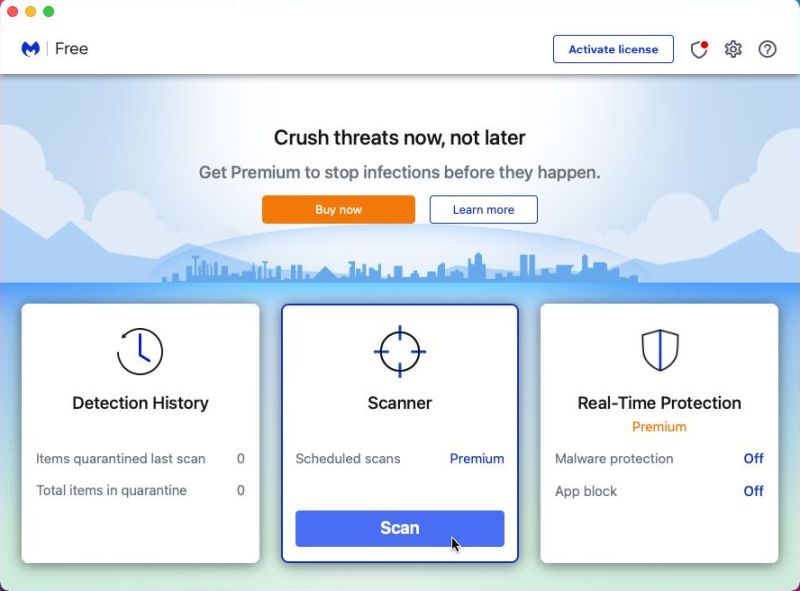
The screenshot below shows the GUI of the free edition (real time protection and scheduled scans disabled). You can now push the Scan button to run a scan on the "most important" PC areas (to run a full or custom scan, click on the Scanner icon above the button).
 |
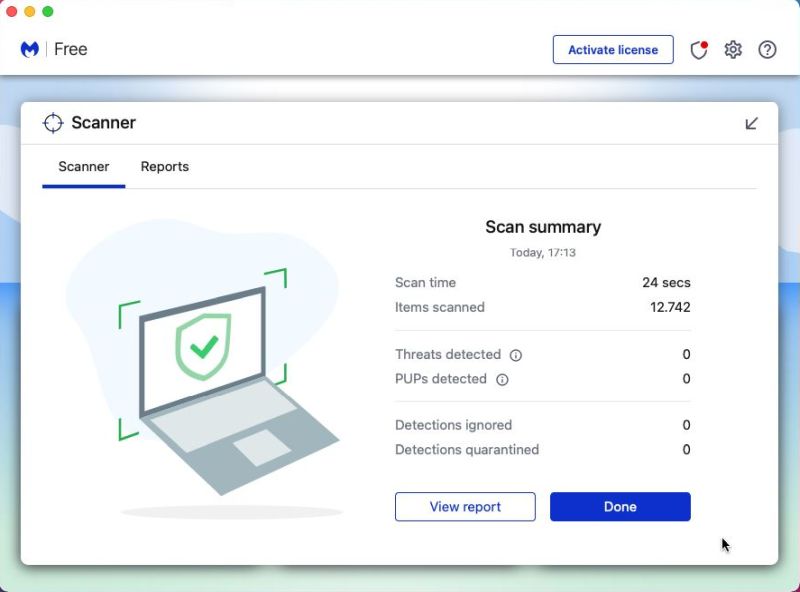
And to terminate the tutorial, here a screenshot of the results of my first scan using Malwarebytes for Mac (free edition).
 |
If you find this text helpful, please, support me and this website by signing my guestbook.