Installing a Linux dual boot with one harddisk.
This tutorial is about the BIOS boot of two Linux distribution, installed side by side on the same computer harddisk. The Linux distributions
used are Fedora Workstation 35 and Deepin Desktop 20.5, both 64bit. Most of the tutorial's content should apply to
most other Linux systems (including two 32bit platforms), provided that they still support legacy BIOS boot.
Implementing this dual boot should not be too difficult, even for beginners. In fact, the only challenge is the need of custom partitioning,
the dual boot configuration being so to say automatic, as Deepin (installed as second OS) will find the Fedora installation and automatically
add it to the GRUB boot menu, from where, at boot time, you can choose which of the two operating systems you want to start.
1. Installing Fedora Workstation 35.
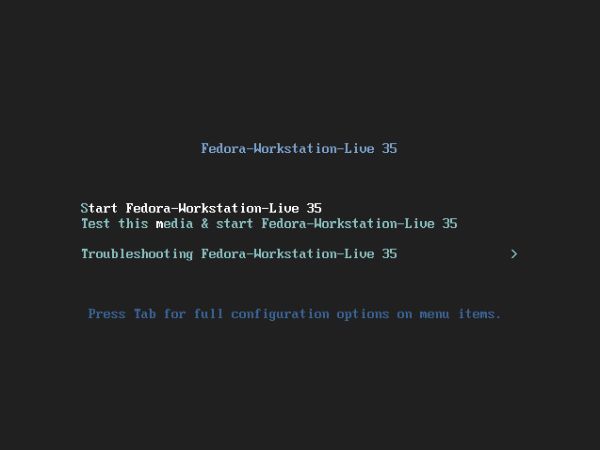
To be sure that your computer is booted from CDROM, boot into BIOS Setup and check if the boot sequence is well 1. CD-drive, 2. harddisk,
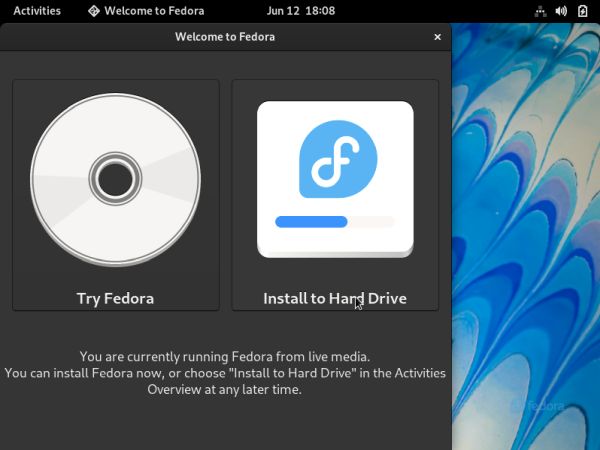
3. removable devices. Insert the Fedora Workstation 35 Live-DVD and power-on the computer. Start into the live environment (screenshot on
the left) and here, select Install to hard drive (screenshot on the right).
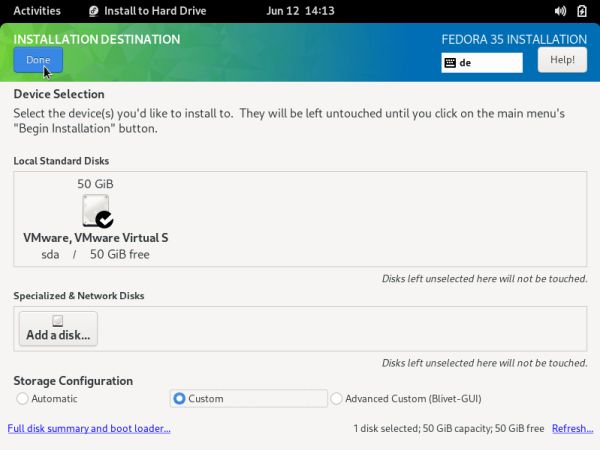
After asking for the language, the keyboard layout and the locale, the setup program displays the Installation Destination screen. The only
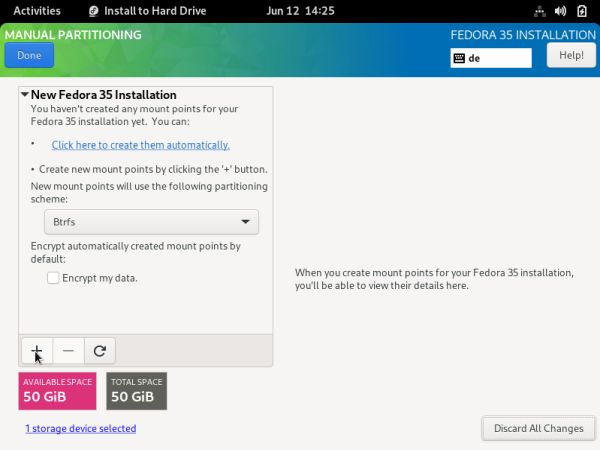
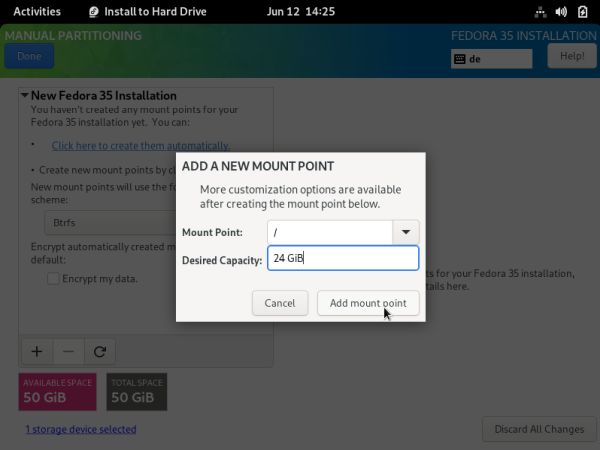
harddisk sda is selected. As we only want a part of it for Fedora, we have to choose Custom as storage configuration (screenshot on the left). On the Manual Partitioning screen, push the +
button to create a new partition (a new mount point) (screenshot on the right).
In the Add a New Mount point window, select / (the filesystem root) as mount point and give it a desired capacity of
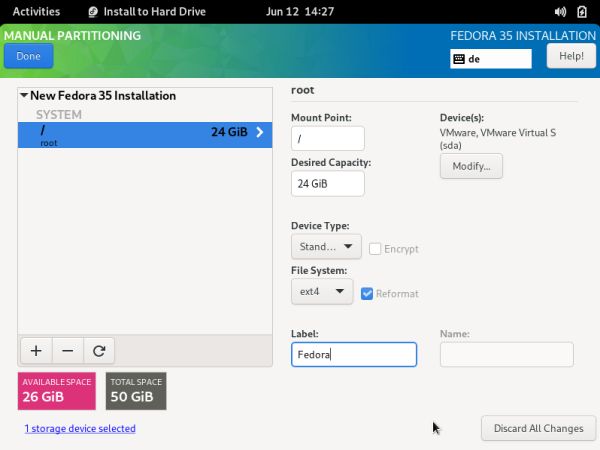
somewhat less than half the disk size (24 GB in my case) (screenshot on the left). Back on the Manual Partitioning screen, configure the new
partition (screenshot on the right): as device type, choose standard partition and as filesystem choose ext4. Be sure
that the Reformat checkbox is selected. You can label the partition, if you like so; I gave it the label "Fedora".
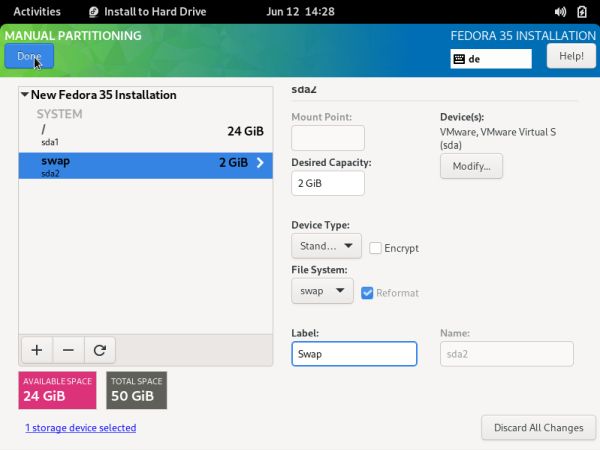
In a similar way as you did for the filesystem root, add now a mount point for swap. On my VMware virtual machine with 2 GB RAM, I gave it a
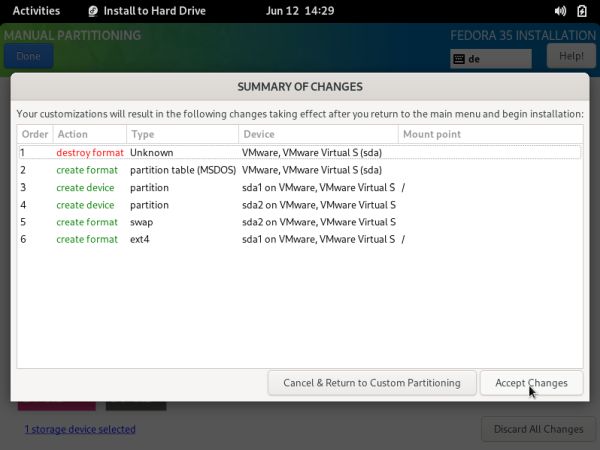
desired capacity of this same size. When swap is configured as shown on the screenshot on the left, push the Done button. A summary of the
changes, that will be made to your system, is displayed. Last chance for you to cancel and go back to the Custom Partitioning page. To
actually make the changes to the harddisk, push the Accept changes button (screenshot on the right).
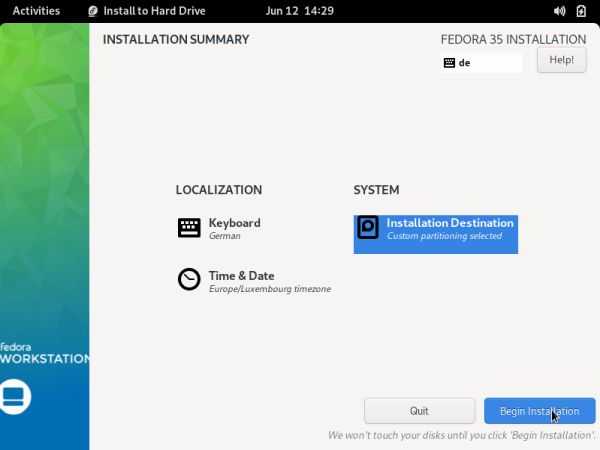
The setup program has now all information to install Fedora. To start install, click the Begin Installation button (screenshot on the left).
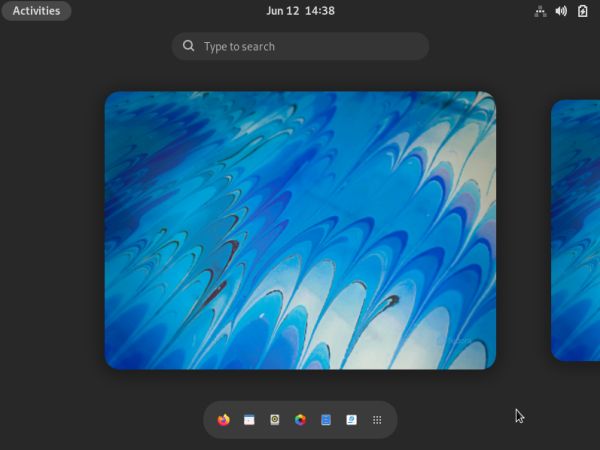
The rest of the installation process should be smooth and without any problems. The screenshot on the right shows my Fedora Workstation 35 desktop after the installation
onto harddisk has been finished.
1. Installing Deepin Desktop 20.5.
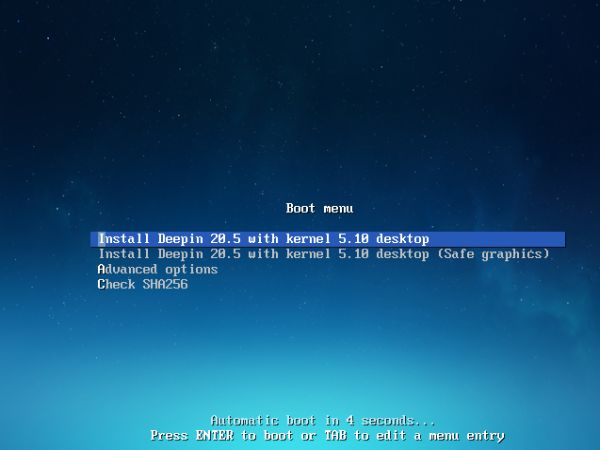
Be sure that the CD drive is set as first boot device in BIOS; boot from the Deepin DVD. Deepin (at least the media I used) isn't a Live-DVD, thus here, no Linux
OS started, but the option to launch the Deepin setup program in order to install the operating system onto the hard disk.
After the selection of the language and, if you install Deepin in a VM, a friendly note, that you should try the OS on real hardware, the Create
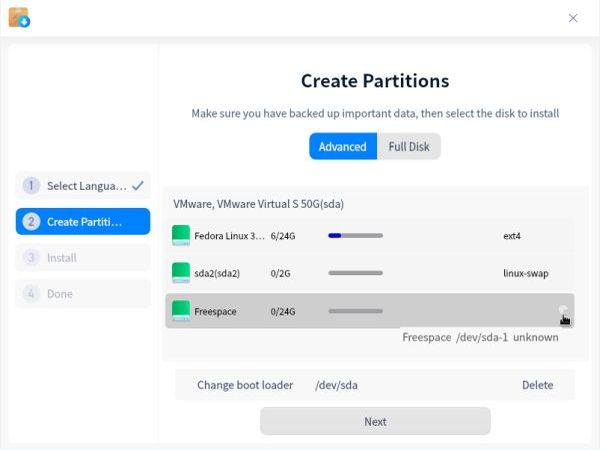
Partitions screen is displayed. Note that the option Advanced (in opposition to Full disk) is selected!
This is the crucial moment of the dual boot installation. If you choose bad settings here, not only you might have only one of the two OS
being available, but also you might destroy the installed Fedora installation! Here's our situation:
- The 50 GB harddisk actually contains the 24 GB ext4 partition /dev/sda1, where Fedora is installed, and a 2 GB swap partition
/dev/sda2. The rest of the disk (24 GB) is not used, thus, obvious choice: install Deepin in the unallocated space after the swap
partition.
- The MBR actually contains the Fedora bootloader, thus booting from the harddisk starts GRUB with the Fedora boot menu, some boot entries for Fedora, but none
for Deepin (because when Fedora was installed, the harddisk was empty). The simplest way to proceed consists in replacing the Fedora bootloader
by the one of Deepin. This is because Linux operating systems nearly always are very tolerant concerning other OS (Linux or not), and when creating the boot
menu, search the disk for already existing operating systems. And if there is one to be found, it is automatically included in the list of OS displayed by GRUB when
the machine is powered on. So, supposing that Deepin behaves as a "normal" Linux, the best choice is to install the bootloader into the MBR
(/dev/sda)
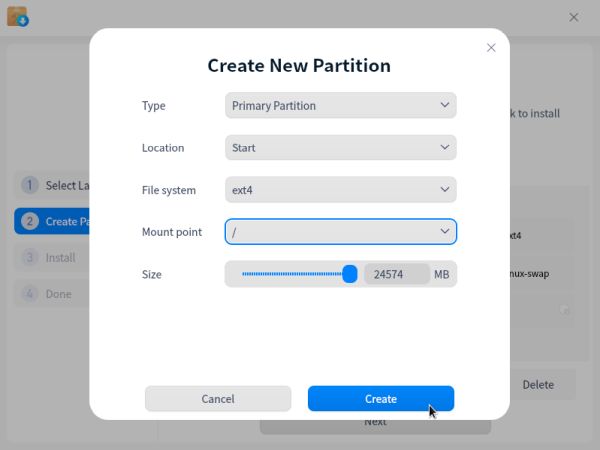
So, on the Create Partitions screen, select the Freespace area to create the new partition for Deepin (screenshot on
the left). Push the Next button to continue with the Create New Partition screen, where you can enter the parameters
for this partition (screenshot on the right): creation of a primary partition with mount point / using the entire free space area. Choose
ext4 as filesystem. When you're done, push the Create button.
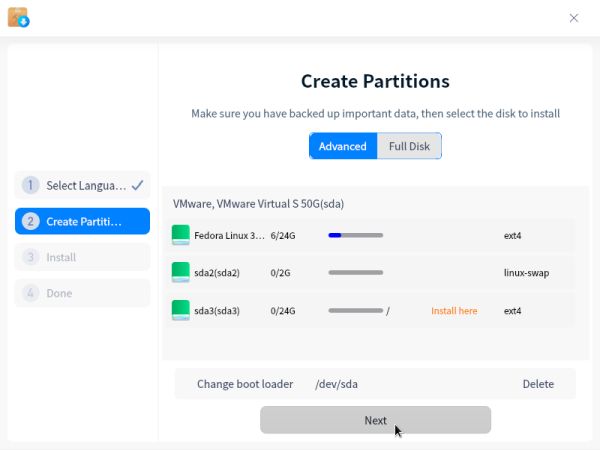
This sends you back to the Create Partitions screen. As you can see on the screenshot on the left, the new partition
/dev/sda3 has been created in the former unallocated space and the Deepin setup program has added the text "Install here" for this partition. If you have a look
at the lower part of the screen, you can see that the installation of the bootloader to /dev/sda has been selected by default. Pushing the
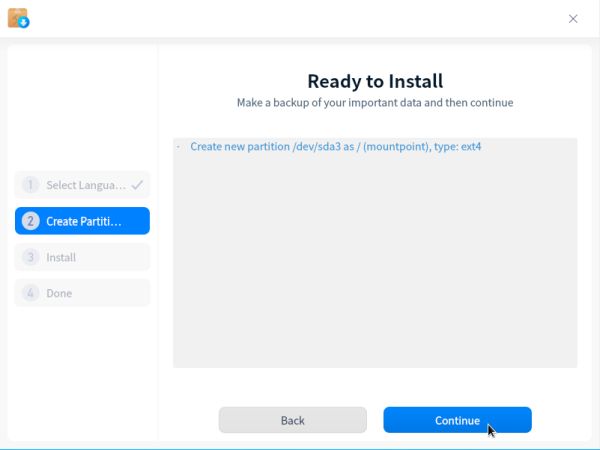
Next button leads you to the Ready to Install screen (screenshot on the right), with the creation of partition
/dev/sda3 with ext4 filesystem as / being the first action to be performed. Push the Continue button to begin.
Deepin Desktop 20.5 is now installed on the harddisk. As the installation was done by the setup program started from the DVD (and not from within a running Live
environment as is the case with Fedora), you have to reboot the computer when installation is done (remove the CD when doing so).
If, during install, you have been surprised that there were neither keyboard layout, nor user configuration asked for, you'll get the reason for this now: With the
first boot of Deepin, a setup wizard is launched. But, didn't there something go wrong? When rebooting, Deepin starts up without displaying a boot
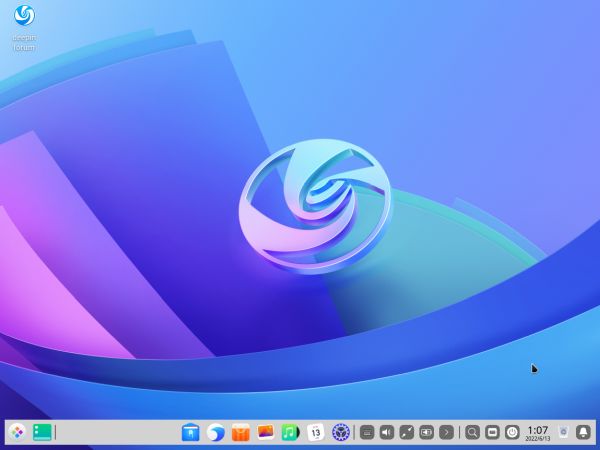
menu!. And when the setup wizard is terminated and you reboot another time, it's again Deepin that is started, with the login screen this time (the screenshot
below shows the Deepin desktop after installation and setup is finished). Should this be a Linux distribution that behaves somewhat like Windows and does not like to
coexist with another OS?
I guess that Deepin is less tolerant concerning other operating systems than Linux systems normally are, but it coexists with others without any problem. The boot menu,
with entries for both Deepin and Fedora, has actually been created; if it is not displayed, it's simply because there wasn't any timeout value set and by this, the
default OS (the one that installs the bootloader) is immediately started. All we have to do is to set a boot timeout value and we don't
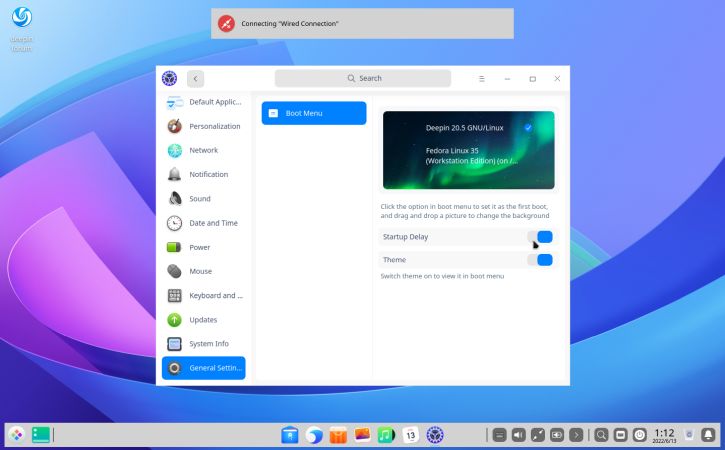
need to edit some configuration file to do this. Open System Settings > General Settings (screenshot on the left). Here you can configure the
essential behavior of the boot process: Choosing the OS to boot by default, setting the timeout value on or off (switch it on now), as well as using or not a
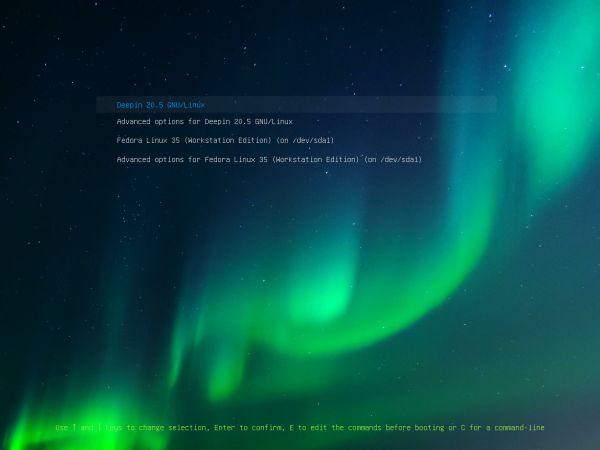
background picture (you can even drag your own picture to here). That's it! The next time you restart the computer, the boot menu, as shown
on the screenshot on the right, will be displayed and you can choose to either boot Deepin or Fedora.
If you find this text helpful, please, support me and this website by
signing my guestbook.
