Harddisk repartitioning on FreeDOS.
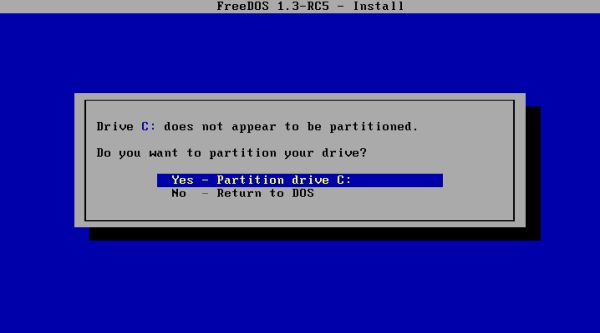
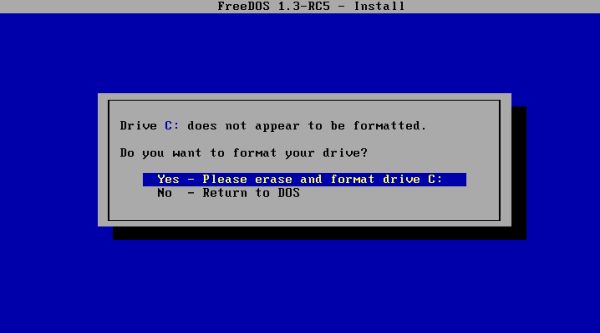
I actually run FreeDOS 1.3 RC5 on a VMware Workstation 16 virtual machine with a 16 GB harddisk. When I installed FreeDOS, I let the setup program do automatic partitioning, in particular I accepted to partition drive C: (screenshot on the left) and to erase and format drive C: (screenshot on the right).
|
|
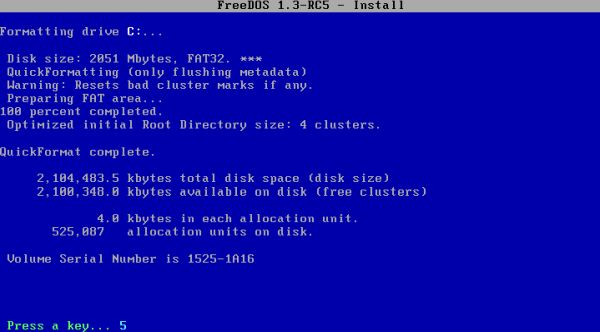
What does this automatic partitioning actually do? If you have a look at the screenshot below, you see that the setup program creates a 2 GB C: partition and formats it using the FAT32 filesystem (as a difference with old DOS systems, FreeDOS supports FAT32). What you can't see on the screenshot is that the setup program creates an extended partition on the rest of the disk and, in this extended partition, creates 7 logical drives (with drive letters D: to J:) with a size of 2 GB each.
 |
That's obviously not what I wanted. In fact my idea was to create 3 partitions: partition C: with a size of 8 GB for the system, partition D: with a size of 5 GB for user data and partition E: with a size of 3 GB (resp. the rest of the disk) for working storage. If you have some experience with a DOS operating system, you probable know the partitioning tool fdisk, that is part of all DOS distributions. It allows to create a new MS-DOS partition table, to delete existing partitions and to create new ones, as well as to set a partition active (to make it bootable). However, it does not include a feature to move or resize a partition.
Globally 3 possibilities to get what I wanted:
- Starting over: Reinstalling FreeDOS, this time creating the partitions (as I want them) manually.
- Taking advantage of being in a virtual environment rather than on a physical system, giving the VM enough RAM to run the gParted live-CD and doing all repartitioning with this (GUI based) tool.
- Finding a DOS application that allows to expand a FAT32 partition and doing the repartitioning using this tool together with fdisk.
As I try as far as possible to run my virtual machines as if they were real computers, the third possibility is my favorite, and I effectively found the tool that I needed. You can download PResizer 1.3.4 from the Disk Utilities 1 page of the Free Software for DOS website. The download archive contains several files, among them PRESIZER.EXE, a really nice program, too nice for getting forgotten and, as links that work today may be dead tomorrow, I decided to place a copy of PResizer on my site.
The repartitioning process may be divided into the following 5 steps:
- Creating a bootable floppy diskette, containing the tools necessary to perform the operation.
- Deleting the extended partition created by the FreeDOS installer (using Free FDisk).
- Extending the C: partition from 2 GB to 8 GB (using PResizer).
- Recreating an extended partition with two logical drives of 5 GB and 3 GB respectively (using Free FDisk).
- Reformatting the newly created partitions (using Free Format).
Creating a bootable floppy diskette.
As we'll go to modify the partitions on the harddisk, we can't run PResizer and FDisk from there. That's why we have to create a bootable floppy diskette, containing everything we need to do the repartitioning. Before doing so, we have to transfer the content of the PResizer download archive to the FreeDOS machine. I unzipped the archive on my Windows 10, copied the files to a (virtual) floppy diskette, mounted this diskette in my virtual floppy drive (that becomes the floppy drive of the FreeDOS VM, when this one is started), and finally copied them to C:\FREEDOS\TEMP (supposed to be empty). Now, that we have all files, we need, on FreeDOS, we can create the bootable floppy.
The simplest way to create a bootable floppy is to use the command
FORMAT A: /S
where the parameter /S is used to copy the system file KERNEL.SYS (in the case of MS-DOS there are two system files called MSDOS.SYS and
IO.SYS) and the command interpreter COMMAND.COM to the diskette. In fact, this command is a combination of FORMAT A:
and SYS A: (SYS.COM being a program that copies the system files from the current drive to the boot sector of the drive specified).
![FreeDOS repartitioning: Creating a bootable floppy diskette [1] FreeDOS repartitioning: Creating a bootable floppy diskette [1]](../screenshots/fdos_repartitioning3a.jpg)
|
![FreeDOS repartitioning: Creating a bootable floppy diskette [2] FreeDOS repartitioning: Creating a bootable floppy diskette [2]](../screenshots/fdos_repartitioning3b.jpg)
|
The other files may be copied using the FreeDOS COPY command. Example usage for FDisk.EXE:
COPY C:\FREEDOS\BIN\FDisk.EXE A:
There are actually 3 files that we'll need: FDisk.EXE and FORMAT.EXE from the FreeDOS installation and PRESIZER.EXE
from the download archive. As there's largely enough space on the diskette, I copied all 4 files of the PResizer download archive and also copied several tools that
may be useful on a boot diskette: SYS.COM (described above), CHKDSK.EXE (the DOS disk check utility), MORE.EXE (the DOS text file viewer utility); it would have been an
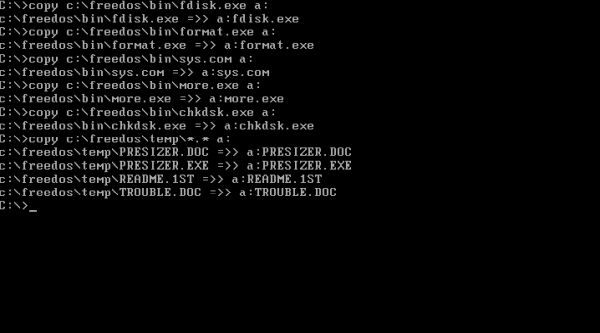
idea to also copy EDIT.COM (the DOS text editor)... The screenshot on the left shows the COPY commands, all FreeDOS files being copied from
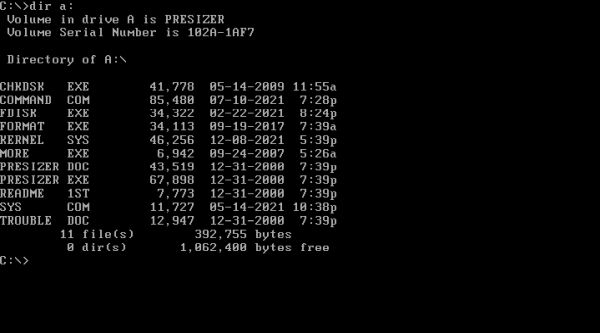
C:\FREEDOS\BIN, the PResizer files being copied from the temporary directory, whee I had placed them before. The screenshot on the right shows the content of my
PResizer boot diskette. Please note that the system file KERNEL.SYS is hidden and thus not displayed in the directory listing.
|
|
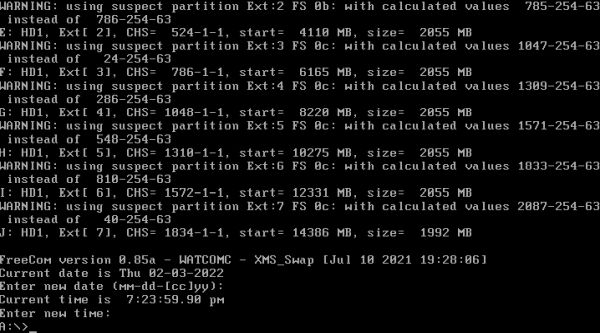
Repartitioning will be done using the FreeDOS system on the diskette. In order be able to boot from the floppy drive instead of booting from the harddisk, we'll have to change the boot order in the BIOS settings, setting the floppy as first boot device. To enter BIOS setup, you'll have to press a given key while the computer powers on. This key is often F2. If you use VMware Workstation, you can use the Boot into firmware functionality. The screenshot below shows the screen output when I booted from the diskette. No idea, why all these warning messages are displayed; I think that you can simply ignore them. You can also see on the screenshot that the FreeDOS command interpreter FreeCom is loaded. Date and time are asked at FreeDOS startup if there isn't an FDAUTO.BAT (or AUTOEXEC.BAT) file; just hit ENTER to let their value unchanged.
 |
Deleting the extended partition.
The UI of the DOS partitioning tool FDisk consists of a main menu, where you can choose an operation (or terminate the program with ESC) and several series of submenus, where the submenu series allow to choose the options for the corresponding operation (if an operation is terminated, use ESC to return to the main menu). All menu and submenu items are assigned a number (displayed in front of the item) and selecting an item is done by entering the corresponding number.
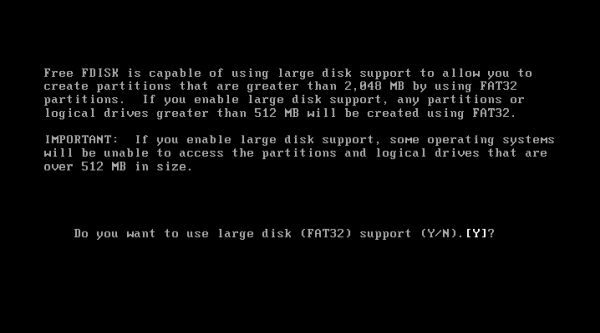
When Free FDisk starts up, it informs the user that it features large disk support, which allows to create partitions that are larger than 2 GB using the FAT32 filesystem (this feature is not supported by FDisk included with MS-DOS or similar DOS distributions). To enable large disk support, answer Y (yes) to the corresponding question.
 |
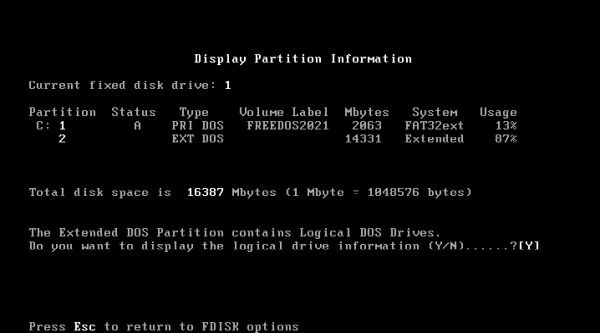
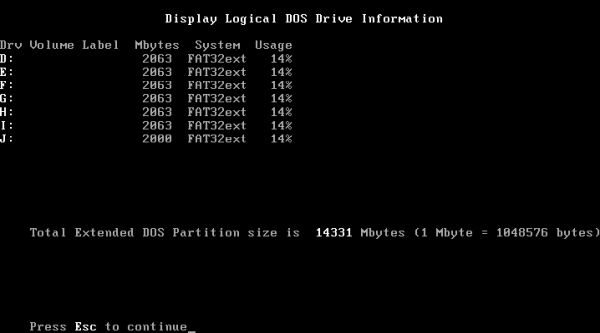
The FDisk main menu has 4 items, the last one being used to display partition information. The screenshot on the left shows the 2 GB primary partition C: (where I installed FreeDOS) and an extended partition on the rest of the disk (14 GB). When answering Y to the question if the logical drive information (i.e. the partitions "inside" the extended partition) should be displayed, you get (on my system, as described further up in the text) the screenshot on the right: 7 partitions with a size of 2 GB each.
|
|
Deleting the extended partition may be done in one step, no need to delete the logical drives ("its content") first. In the main FDisk menu, choose the third option: Delete partition or Logical drive (screenshot on the left). In the Delete partition submenu, choose the 2nd option: Delete extended DOS partition (screenshot on the right).
![FreeDOS repartitioning: Deleting the extended partition [1] FreeDOS repartitioning: Deleting the extended partition [1]](../screenshots/fdos_repartitioning8a.jpg)
|
![FreeDOS repartitioning: Deleting the extended partition [2] FreeDOS repartitioning: Deleting the extended partition [2]](../screenshots/fdos_repartitioning8b.jpg)
|
You'll have to confirm this operation before the partition will effectively be deleted. Please, note that in a situation, where one of the logical drives would contain data, it would all be lost! Press the ESC key to return to the main menu. You can use option 4 to check that the extended partition has been erased (just the primary partition C: remaining). To quit FDisk, press ESC another time.
Expanding the primary partition.
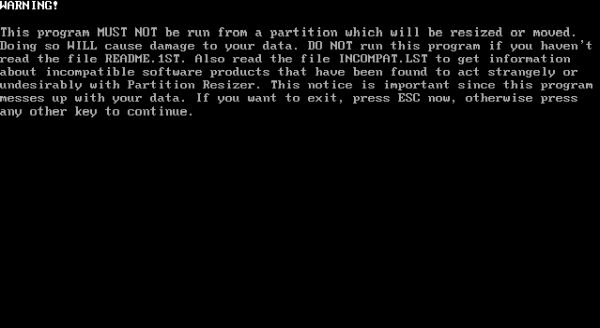
We'll now expand our primary partition C: from 2 GB to 8 GB using this amazing partition resizing utility PResizer that, fortunately for us not only supports the FAT16 but also the FAT32 filesystem. PResizer starts up with a warning. Obvious, that you cannot run the utility from the partition that you want to resize, obvious also that resizing a partition is a rather complex procedure, and even if these tools normally work without problems, there is always a possibility that something goes wrong and you should be aware that in this case you'll lose all your data. Thus, if you want to be 100% secure, you should backup partition C: before proceeding.
 |
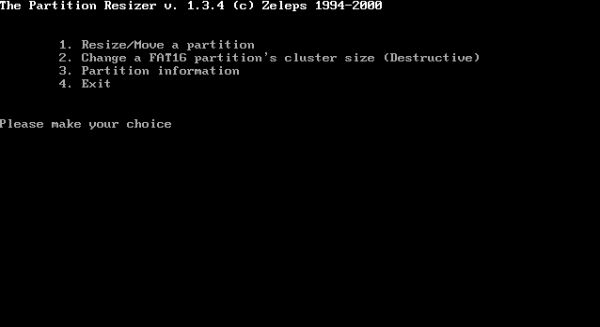
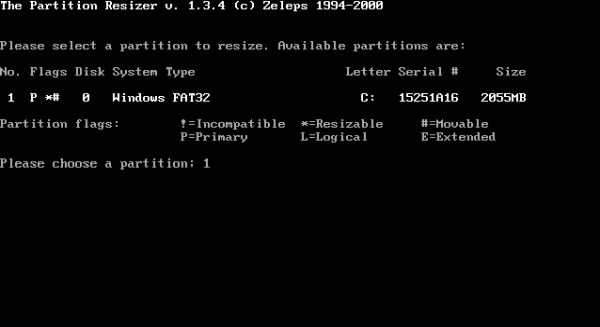
As FDisk, PResizer presents a main menu with the operations to take and submenu series depending on the operation selected. On the main menu screen (screenshot on the left), choose the first option: Resize/Move a partition. The submenu screen that follows (screenshot on the right) allows to choose the partition that we want to move or resize. There is a single one in our case. Important here to have a look at the partition flags: A partition that may be resized is marked with an asterisk sign (*), a partition that may be moved with a number (#) sign. In our case, both flags are there, so, normally no problem to perform the expansion operation. Enter 1 to expand the C: partition.
|
|
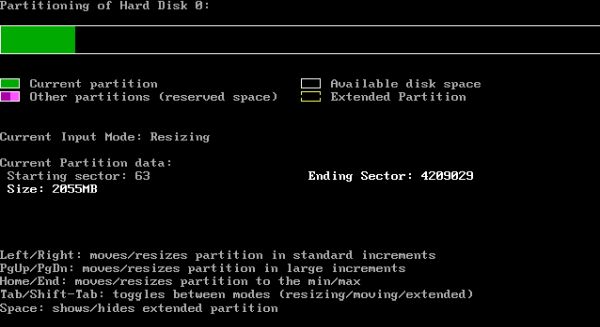
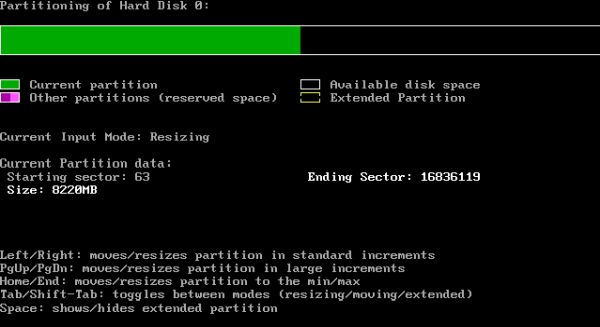
The amazing thing with this program is that all operations may be done by predefined keystrokes (no need to enter any size values). The important keys are as follows:
- TAB and Shift-TAB: toggle between operation modes (resizing, moving, extended); the current mode is displayed below the legend of the disk graph.
- Right and left arrow keys: Resizes/moves a partition in small increments resp. decrements.
- PageUp and PageDown: Resizes/moves a partition in large increments resp. decrements.
|
|
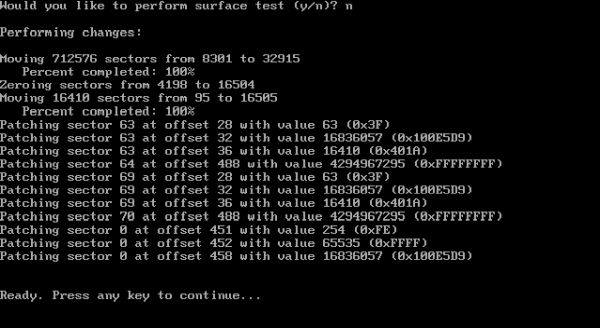
After confirming the partition resizing, the operation is actually carried out. The screenshot below shows the program output when I expanded the C: partition on my FreeDOS VM.
 |
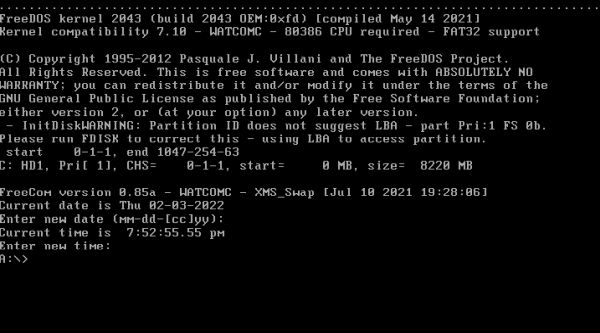
After having resized the C: partition, you have to reboot. A warning that the partition ID does not suggest LBA is displayed. This message may simply be ignored (at least I think so).
 |
Creating the logical drives.
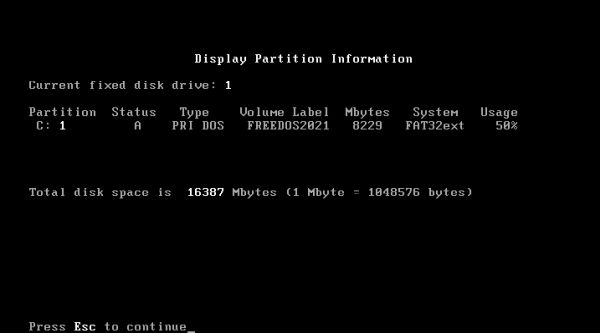
To create the data partition D: and the work partition E: we use again Free FDisk. From the main menu, we can choose the last option to display the partition information: just one partition (primary, of course), with drive letter C: and a size of 8 GB.
 |
DOS operating systems support only one primary partition. Thus, D: and E: have to be created as logical drives "inside" an extended partition. To create this extended partition, choose the first FDisk option Create DOS partition or Logical Drive in the main menu (screenshot at the left), then the second option Create extended DOS partition in the following submenu (screenshot at the right).
![FreeDOS repartitioning: FDisk - Creating an extended partition [1] FreeDOS repartitioning: FDisk - Creating an extended partition [1]](../screenshots/fdos_repartitioning15a.jpg)
|
![FreeDOS repartitioning: FDisk - Creating an extended partition [2] FreeDOS repartitioning: FDisk - Creating an extended partition [2]](../screenshots/fdos_repartitioning15b.jpg)
|
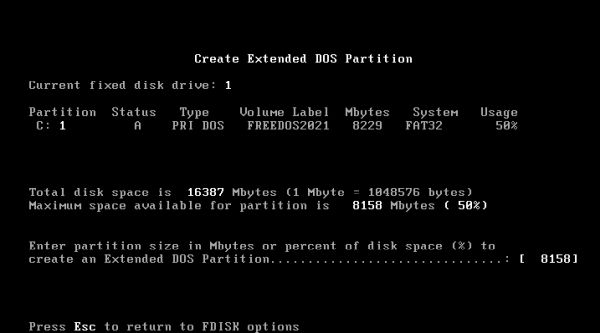
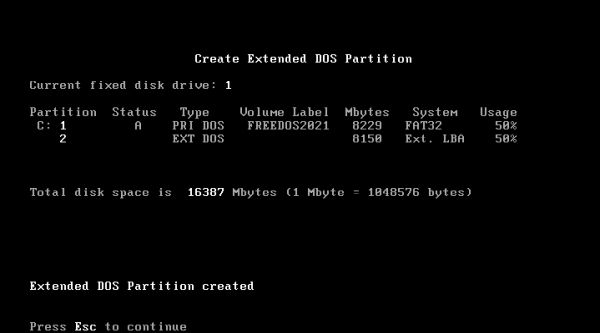
On the next screen you have to enter the extended partition size (screenshot on the left). Obvious, that this has to be the rest of the disk, i.e. the entire 8 GB of non allocated space available (this value is filled in by default). The screenshot at the right shows the disk layout after the extended partition has been created.
|
|
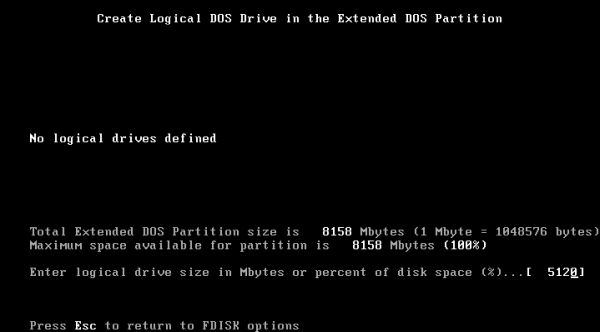
An extended partition is just a container that can not be accessed as such. Partitions other than the primary (containing the DOS operating system) have to be created as logical drives that actually are disk areas "inside" an extended partition. That's why FDisk issues the message "No logical drives defined" and proposes to create a new logical drive with the size of the extended partition. The logical drive size can be changed, and the 5120 MB value that you can see on the screenshot on the left corresponds to the 5 GB that we want to give to our data partition. As there is still space available within the extended partition, FDisk proposes to create another logical drive. This time we can accept the default value; these remaining 3 GB will be used for our work partition (screenshot on the right).
|
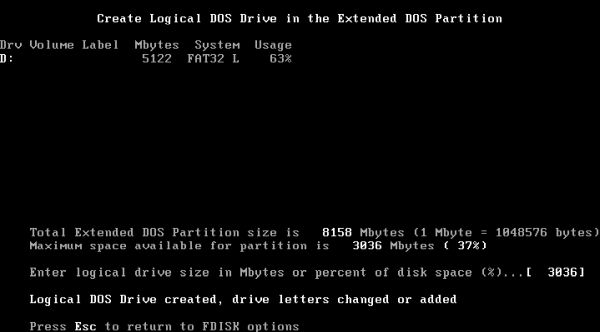
|
With the two logical drives created all available space "inside" the extended partition has been assigned. The screenshot shows the "content" of the extended partition: a 5 GB partition with drive letter D: (our data partition) and a 3 GB partition with the drive letter E: (our work partition).
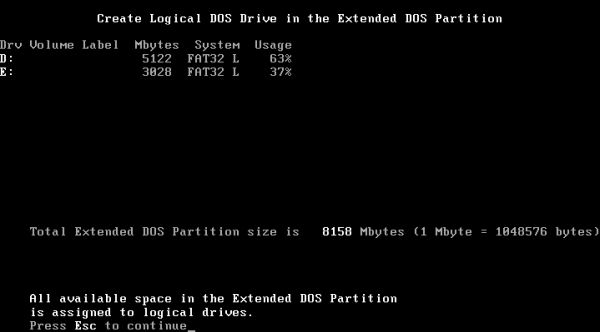 |
Formatting the logical drives.
The partition information in FDisk is somewhat ambiguous: The two logical drives are shown with a FAT32 filesystem, so you could think that they are all ready for usage. This is not the case. The newly created partitions have to be formatted manually. This may be done using Free Format, that supports FAT32. The screenshots show the formatting operation: at the left, the 5 GB partition D: that we label "DATA" and at the right the 3 GB partition E: that we label WORK.
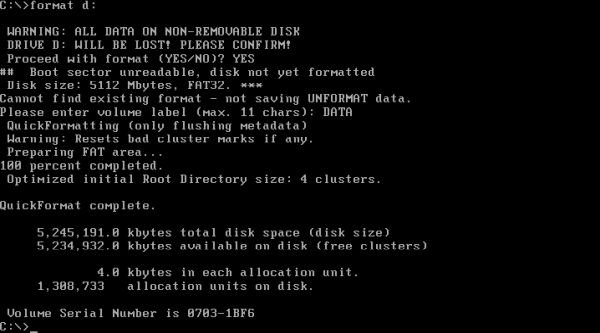
|
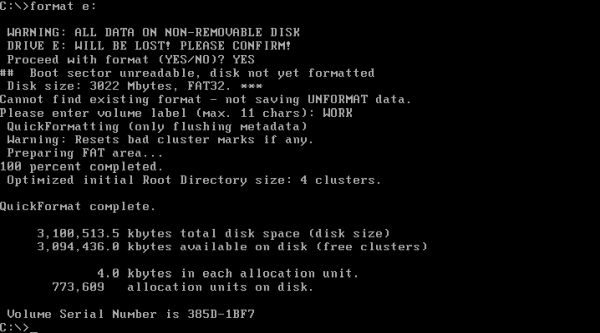
|
That's it. Starting with a harddisk with eight 2 GB partitions, we have repartitioned the disk to the following layout: partition C: (FREEDOS2021), 8GB; partition D: (DATA), 5 GB, and partition E: (WORK), 3 GB!
If you find this text helpful, please, support me and this website by signing my guestbook.