Running 3 different DOS on the same machine.
Before coming-up of virtualization software, the only possibility to run several operating systems on the same machine was multi-boot, i.e. the installation of 2 or more OS side by side and using a boot manager that allowed to choose the OS to actually be booted. This tutorial describes, how to proceed to install MS-DOS 7.1, PC-DOS 2000 and MS-DOS 6.22 on the same harddisk; the procedure should also apply to other DOS distributions.
The boot requirements of DOS operating systems are rather strict in comparison with more recent OS:
- The harddisk layout may only include one single primary partition.
- DOS may only be installed on a primary partition (that has to be set "active").
These two conditions to boot a DOS system seem to be exclusive. How can we install a second and a third DOS on a primary partition if the disk may only have one single primary partition? The answer is: Booting our 3 DOS using a separate boot manager. Boot managers are special software that are started when the computer is turned on and then display a boot menu from which the user can choose the OS to actually be booted. Boot managers also include special partition related features, in particular the possibility to make partitions invisible to an operating system. Thus, in the case of our DOS triple boot, we can install each DOS onto a primary partition. When one of the DOS systems is selected, the boot manager will hide the other primary partitions, will set the partition of the DOS to be booted active and hereby all conditions to make this DOS bootable will be fulfilled.
I chose to use the OS/2 2.1 Boot Manager to boot my 3 DOS systems. The advantage of this boot manager is that it may be installed itself from the OS/2 installation diskettes and makes it really easy to add the 3 DOS to its boot menu. Its major disadvantage is that the hard disk size is limited to 2 GB (what is not really a problem in our case). So, we'll have to partition our harddisk, creating 4 primary partitions, install the OS/2 boot manager onto the first partition, add the 3 other partitions to the boot menu and finally install the 3 DOS, each of them onto one of the remaining primary partitions, set active for the installation, and the others partitions being made invisible. Sounds complicated? Maybe not really easy, but not too heavy either, as you will see.
Concerning my VMware virtual machine, here the major settings: Operating system: Other > MS-DOS; RAM: 128 MB; Harddisk: Bus logic, IDE, 2 GB, floppy drive, IDE CD drive.
1. Installing the OS/2 Boot Manager.
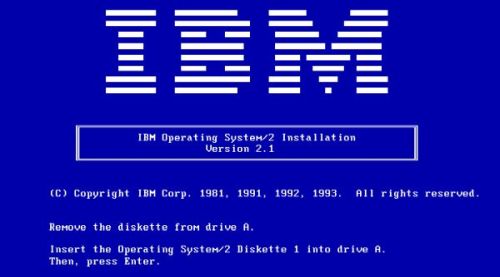
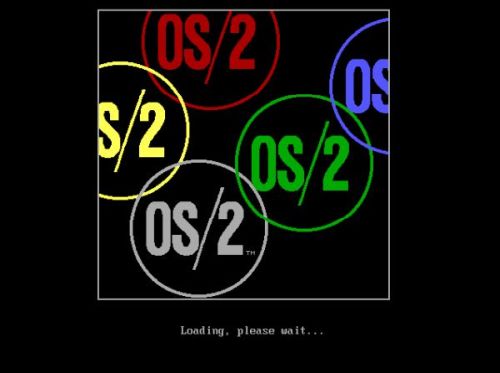
As I said I use the boot manager of OS/2 2.1; you can download the installation diskettes from the OS/2 2.1 page on the WinWorld website. Be sure that the boot sequence in your machine's BIOS is set with removable media as first boot device. Boot the machine from diskette 0; the blue IBM boot screen (screenshot on the left) is shown. Remove the diskette and insert diskette 1, then press ENTER; the colorful OS/2 boot screen (screenshot on the right) is shown while the operating system is loading.
|
|
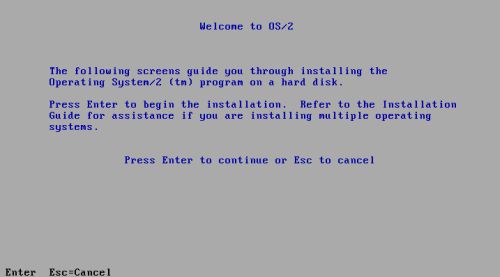
On the Welcome to OS/2 screen, hit the ESC key to quit OS/2 2.1 setup and to go to the OS/2 command line.
|
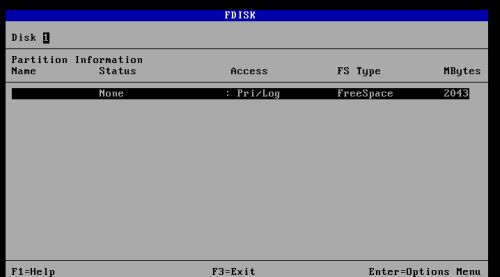
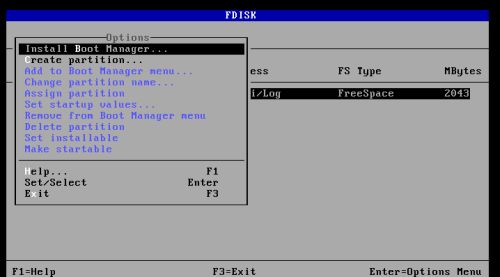
Launch the OS/2 partition tool by typing fdisk. Disk layout is displayed as a free space area of 2 GB (screenshot on the left), what actually is the size of the harddisk. This means that the disk doesn't contain any partitions yet, in other words, the entire disk actually is unallocated. Hit ENTER to display the Options menu. From the available items, choose Install Boot Manager (screenshot on the right).
|
|
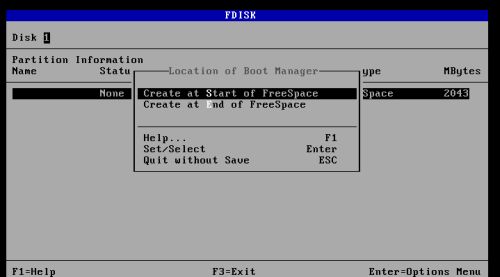
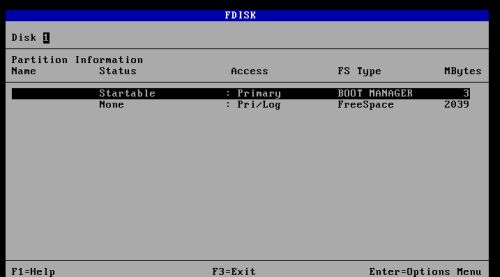
The OS/2 Boot Manager will have its own partition, that may be created at the start or the end of the free space (screenshot on the left). As we can see on the screenshot on the right, fdisk creates a primary partition of 3 MB. The partition is typed as "Boot Manager" filesystem and is set "startable".
|
|
2. Creating the DOS partitions and adding them to the boot manager.
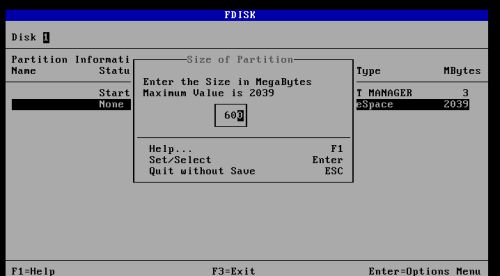
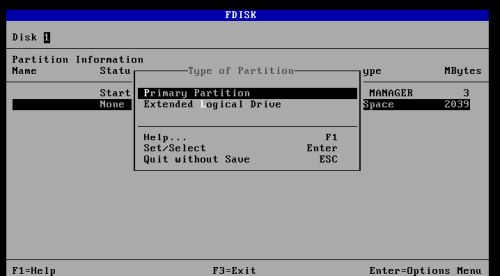
We will now create the three primary partitions for our three DOS systems. With the free space selected, from the fdisk Options menu, choose Create partition. On the 3 following screens, choose respectively a partition size of 600 MB (screenshot on the left), to create a primary partition (screenshot on the right), and to create the partition at the end of the free space (no screenshot).
|
|
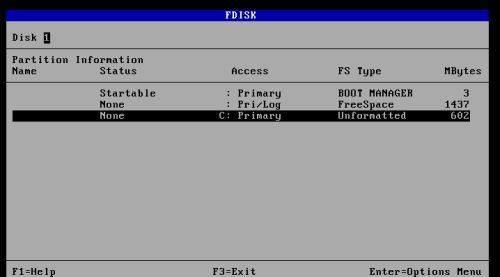
The screenshot below shows the result of the operation. You can see that the partition size has been rounded to 602 MB and that the newly created partition has been assigned C: as drive letter.
|
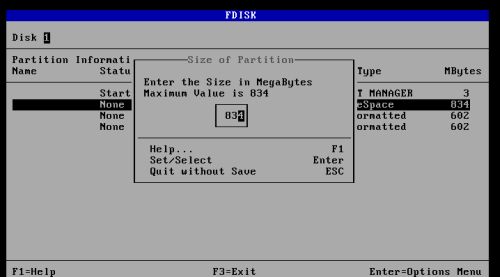
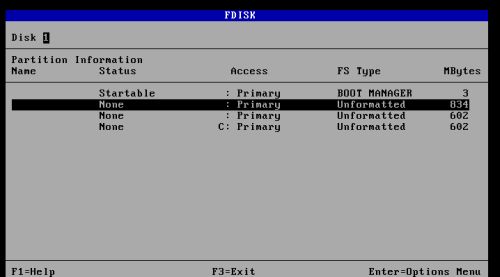
Repeat the steps above to create another 600 MB primary partition at the end of the now 1437 MB free space. Then, create the fourth primary partition, giving it the entire remaining free space (834 MB) as size (screenshot on the left). The disk layout with 4 primary partitions (one for the boot manager, the 3 other for our 3 DOS systems) is shown on the screenshot on the right.
|
|
Now, we can add the 3 DOS partitions to the boot manager. To do this, select the partition that you want to add, and from the Options menu, choose Add to Boot Manager menu (first DOS partition on the screenshot on the left). fdisk asks you for a name for the partition. This name will be used as identifier of the partition (and its OS) in the boot manager's boot menu (the partition is not formatted by fdisk, thus this name has nothing to do with its volume label). On my system, the first DOS partition (second partition on the disk; the largest one of the 3 DOS partitions) is for MS-DOS 7.10, the second DOS partition for PC-DOS 2000. The third DOS partition was initially intended for IMS Royal-32; I later chose to use MS-DOS 6.22, as the installation of IMS Royal-32 failed. If I mention this here, it's because of the partition names appearing on the screenshots. In fact, they correspond to my initial idea. That's why, on the screenshot on the right, that shows how I named my first DOS partition, the name "MS-DOS" is used (later on, I renamed the first menu entry to "MSDOS710").
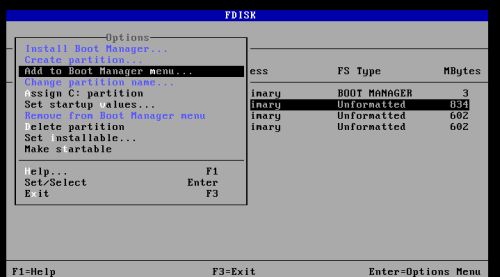
|
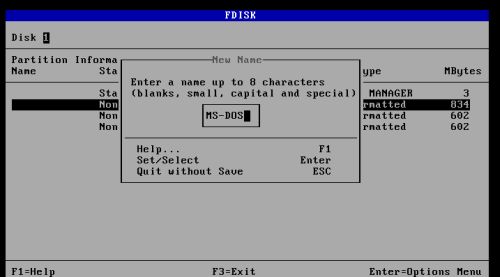
|
We can repeat this last step for the other two DOS partitions. In my initial layout, I used the partition names "PC-DOS" and "IMS-DOS" (later on, I changed the names to "PCDOS70" and "MSDOS622"). Adding the partitions to the boot manager, not only adds the partition names in the "Name" column, but also sets their status to "bootable". This is obvious, because if a partition has an entry in the boot menu, it is supposed that it contains an operating system that can be booted by selecting this menu entry.
I had decided to install MS-DOS 7.10 first. This is not possible with our actual configuration. That is because drive letter C: is assigned to the last partition on the disk (the partition that we created as the first one) and if we would launch the installation of MS-DOS 7.10 with these settings, it would be installed to that partition. Thus, before we can install MS-DOS 7.10, we'll have to assign the drive letter C: to the first DOS partition. To do this, select the 834 MB partition and from the Options menu, choose Set installable.
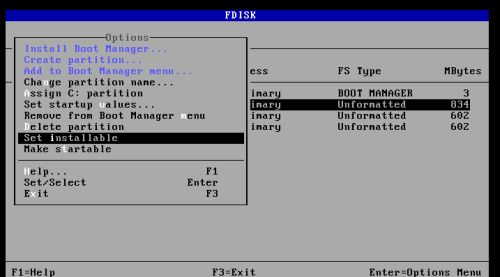
|
The screenshot below shows the new disk layout, with all 3 DOS partitions named (i.e. added to the boot menu) and the first DOS partition set "installable" (i.e. having the drive letter C: assigned to it).
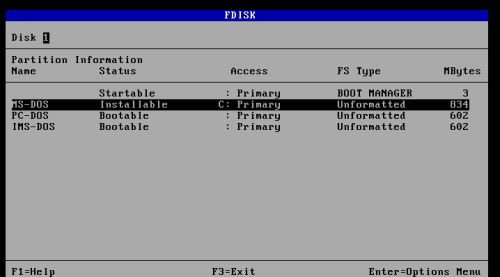
|
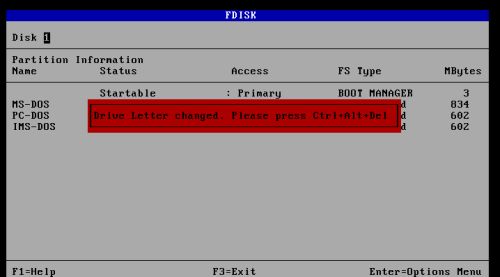
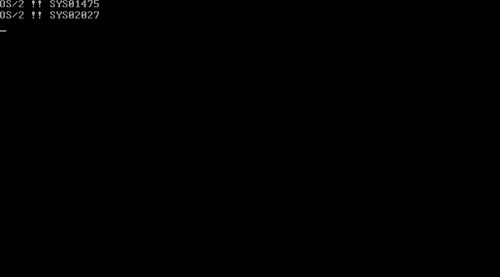
We are done with fdisk now. Press the F3 key and in the dialog box popping up, choose Save and Exit (there is also an option to quit fdisk without saving the changes that we made to the disk). A warning message pops up, telling us that the drive letter (C:) has changed (screenshot on the left). Push CTRL+ALT+DEL to reset the machine. And don't be afraid if you get a black screen with two OS/2 error codes (screenshot on the right). This is all normal. The BIOS is set to boot from the floppy drive and the diskette, that this one actually contains, is not directly bootable (remember: to boot OS/2, we had to start the computer with diskette 0 in the floppy drive and to insert diskette 1 only when asked to do so).
|
|
Important note: Choosing Save and Exit will not only change the partition and booting settings, but will also write the OS/2 Boot Manager boot loader into the MBR!
3. Installing MS-DOS 7.10.
MS-DOS 7.0 (Windows 95 RTM), MS-DOS 7.1 (Windows 95 OSR2.x and 98) and MS-DOS 8.0 (crippled; Windows ME) were never released by Microsoft as standalone products. MS-DOS 7.1 (CDU) is a popular custom compilation of MS-DOS and useful utilities created by China DOS Union. The underlying version of DOS is the same used under the hood for Windows 95B and Windows 98, which includes support for the FAT32 file system and long filenames. This version of DOS may be downloaded as CD image from the MS-DOS 7.1 page at the WinWorld website.
This tutorial is about the installation of a DOS triple boot. That's why the installation of MS-DOS 7.10 is not detailed here. What is described in the following paragraphs, is the disk (partitioning) related part of the installation.
Before we can start, we have to change the boot order in the BIOS (to enter BIOS setup, you have to press a given key, often F2, when the computer starts up; with VMware Workstation, you can also use the menu command "Power on to firmware"). Set the CDROM as first, the harddisk as second and removable media as third boot device.
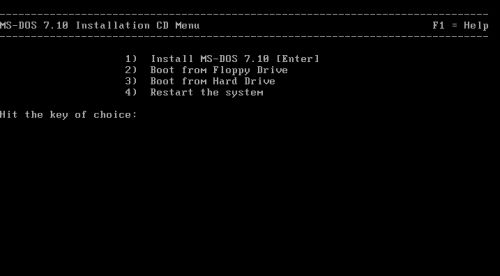
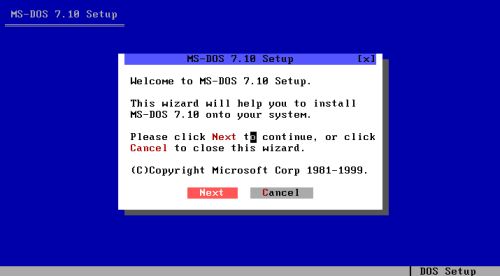
This done, insert the installation CDROM (aka: mount the downloaded ISO in your virtualization software) and start the machine. The MS-DOS 7.10 Installation CD menu is displayed. Press the "1" key, or simply hit ENTER to install MS-DOS 7.10 (screenshot on the left). Setup of MS-DOS 7.10 starts with a Welcome screen, as shown on the screenshot on the right.
|
|
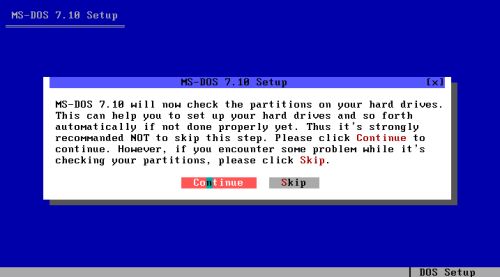
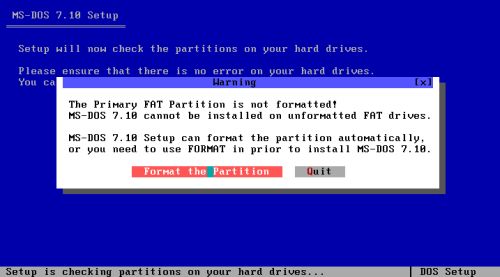
After some MS-DOS related information and the acceptance of the license. the setup program makes the proposal to check the harddisk partitions. Push the Continue button to let it do the check (screenshot on the left). It will find an unformatted primary partition and asks you if you want to format it. Push the Format the partition button to do so (screenshot on the right).
|
|
Note: The primary partition, that the setup program is speaking about, actually is our 834 MB partition. Setting this partition as "installable" in OS/2 Boot Manager, has as result that the MS-DOS 7.10 setup program sees this partition as the C: drive. It also is the only partition it can see, because the 3 other primary partitions have been hidden by the boot manager.
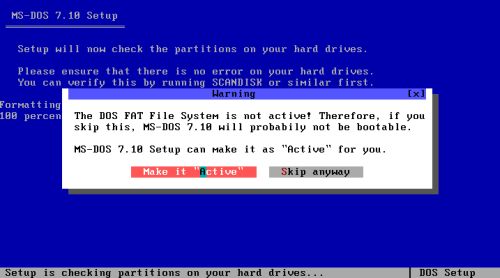
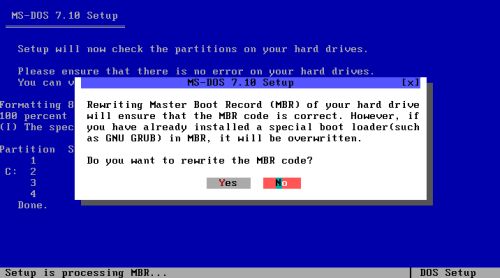
The setup program does not see them, but suspects that there is at least one hidden primary partition and says that on the next screen; just push the OK button to continue. On the following two screens, you are asked if you want to set the DOS FAT filesystem active (screenshot on the left) and if you want to rewrite the MBR, i.e. write the DOS boot loader into the MBR (screenshot on the right). In a one single OS situation, it would be mandatory to perform both of these actions, otherwise DOS could not boot. In our case, it doesn't matter (I chose to set the partition active and not to rewrite the MBR). For the simple reason that we will use the OS/2 diskette to boot until all 3 DOS will be installed.
|
|
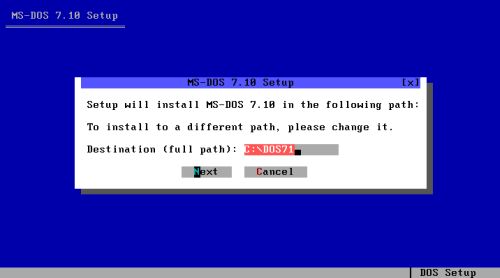
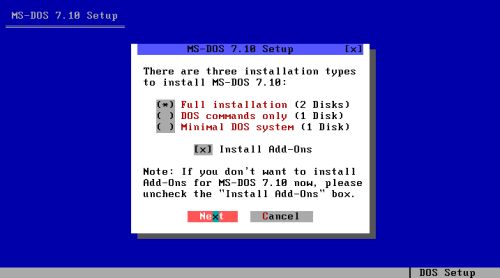
Partitioning and booting configured, the setup program asks for the installation directory. I accepted the default C:\DOS71 (screenshot on the left). Then, you have the possibility to choose the installation type. I chose to do a "full installation", including the install of the add-ons (screenshot on the right).
|
|
From this point on, setup on our triple boot machine will be exactly the same as a regular (one single OS) MS-DOS 7.10 installation. I will some day write a tutorial about it... After the installation of MS-DOS 7.10 is finished, shut down the computer.
4. Installing PC-DOS 2000.
IBM PC-DOS was an IBM branded version of MS-DOS licensed from Microsoft for use on the IBM PC system. Versions of PC-DOS paralleled that of MS-DOS up until version 6.1, where PC-DOS was independently maintained by IBM up until 7.1, the last version. PC-DOS 2000 is an update to PC-DOS 7.0 that fixes Y2K bugs. It is marketed as "PC-DOS 2000" but it reports itself as "IBM PC DOS 7.00, revision 1". PC-DOS 2000 may be downloaded from the PC-DOS 2000 page at the WinWorld website. I downloaded the English language ISO, that actually is a non-bootable CD image, containing a setup program to install PC-DOS 2000. This means that PC-DOS 2000 (at least this version) has to be installed over an existing DOS system. The best choice here had probably been PC-DOS 7.0, but I opted to install MS-DOS 6.22 (I guess that I did it to avoid problems with the XDF format of the PC-DOS 7.0 diskettes as available at the WinWorld website). The setup diskettes of MS-DOS 6.22 may be downloaded from the MS-DOS 6.22 page at the WinWorld website.
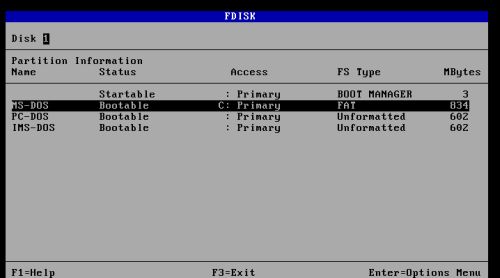
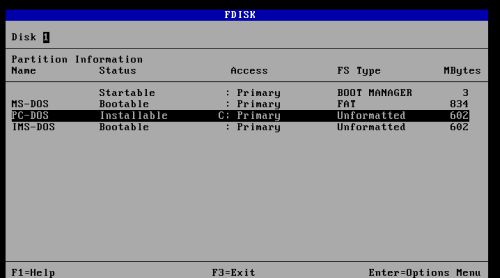
The first thing that we have to do is to make the second DOS partition installable. To be able to boot from the OS/2 diskettes, we have to change the BIOS boot order, setting the removable media (the floppy drive) as first boot device. Now we can start the machine from the OS/2 2.1 diskette 0, and insert diskette 1 when asked to do so. As before, on the Welcome to OS/2 screen, hit the ESC key to quit OS/2 2.1 setup and to go to the OS/2 command line. From here, start fdisk. The screenshot on the left shows the partition layout at the current stage: The first DOS partition (where we installed MS-DOS 7.10) appears as FAT formatted and has drive letter C: assigned. To make the second DOS partition installable, select it and choose Set installable from the Options menu. The screenshot on the right shows the resulting partition layout, with drive letter C: now being assigned to the second DOS partition (to note that the boot manager partition names are those corresponding to my initial installation idea...).
|
|
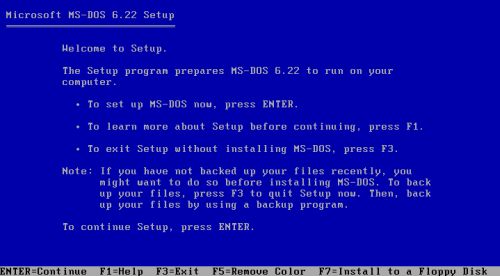
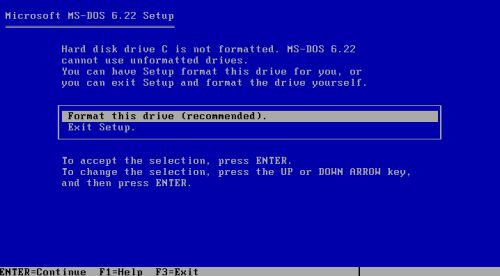
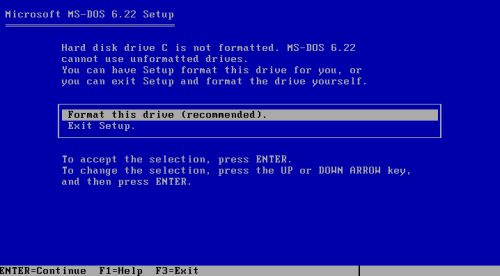
Now, start the machine from the MS-DOS 6.22 diskette 1. The screenshot on the left shows the MS-DOS 6.22 Welcome screen; hit ENTER to start setup. As the OS/2 Boot Manager has hidden all partitions, except the third one (the one appearing as PC-DOS on the screenshots above), all that the MS-DOS 6.22 setup program sees from the harddisk is a 602 MB primary partition, that isn't yet formatted. This partition appears to it as drive C: and the setup program asks if you want to format drive C: now; hit ENTER to do so (screenshot on the right).
|
|
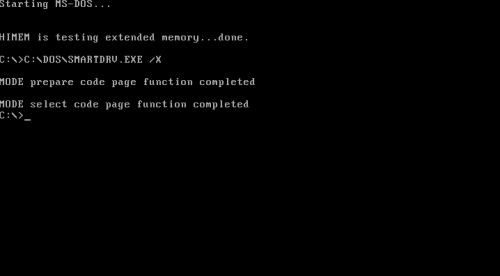
Continue with the installation, following the instructions of the setup wizard. When installation is complete, disconnect the floppy drive and reboot the computer from the harddisk: MS-DOS 6.22 starts up.
|
Surprised that it's MS-DOS that is started? Where has the Boot Manager gone? Is MS-DOS 7.10 no more bootable? The first operating systems of Microsoft (MS-DOS as well as Windows) did not tolerate another OS to be installed aside of them. If the existing partitions aren't hidden, setup uses the entire disk, erasing any OS already installed. And, the Microsoft setup program writes its own boot loader into the MBR, overwriting a possibly existing one without asking. So, our OS/2 Boot Manager boot loader has been overwritten by the MS-DOS boot loader; that's why MS-DOS 6.22 (and not the Boot Manager with its boot menu) starts up. Even though it seems so, we have nothing lost of what we had installed before. The Boot Manager files, with the information about all 3 DOS partitions, are still available on the very first partition of the disk and all we'll have to do to have access to the boot menu and the 3 OS referenced there is to restore the OS/2 Boot Manager into the MBR...
Our PC-DOS 2000 files being on a CDROM, and MS-DOS 6.22 setup does not install (in fact, does not include) the required drivers, to access it, we'll have to install
CD support, using the drivers found "somewhere else". For IDE CD drives, NEC_IDE.SYS from the Windows 95 CD (that
may be downloaded from the WinWorld website) works fine together with
MSCDEX.EXE (from the same CD). You can use a floppy diskette to copy the two files to your C:\DOS directory. The driver has to be loaded
from CONFIG.SYS and, as DISPLAY.SYS, we can load it into high memory:
DEVICEHIGH=C:\DOS\NEC_IDE.SYS /D:MSCD001
The /D parameter specifies a name for the driver. The same name must be used with the /D parameter of MSCDEX, that is typically launched from AUTOEXEC.BAT:
C:\DOS\MSCDEX /D:MSCD001
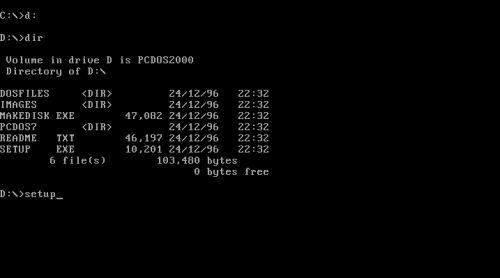
When rebooting (from the harddisk), the CD drive will be available as D: drive. With the PC-DOS 2000 CDROM inserted, we can use the dir command to view the CD content. To start the installation of PC-DOS 2000, type setup.
|
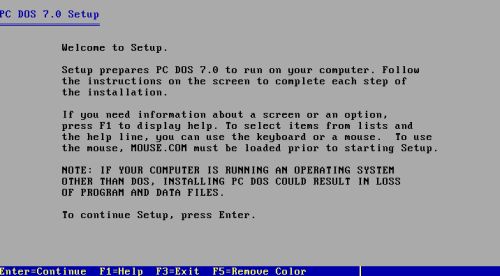
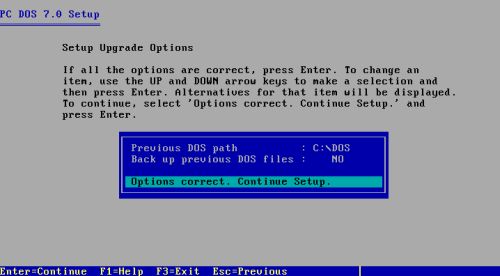
The screenshot on the left shows the PC-DOS 2000 Welcome screen. On the following screens, choose your country and keyboard layout, choose which optional tools you want to install and which not, then, on the Setup Upgrade Options screen, confirm the previous DOS path (C:\DOS) and choose to backup or not the previous DOS files (screenshot on the right).
|
|
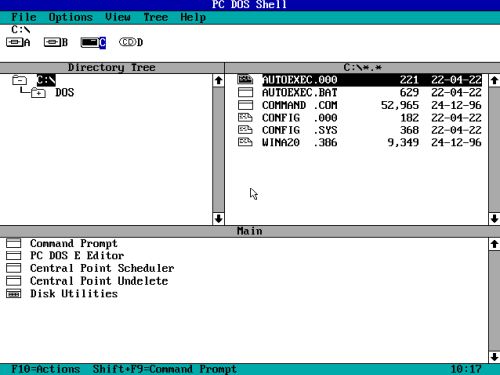
Finally, you have the opportunity to edit the system files (I let all defaults). When the installation is complete, disconnect the floppy drive, remove the CDROM and reboot the computer (from the harddisk). The graphical shell of PC-DOS 2000 is started. Play a little bit around with the OS if you like. When done, shut down the computer.
|
5. Installing MS-DOS 6.22.
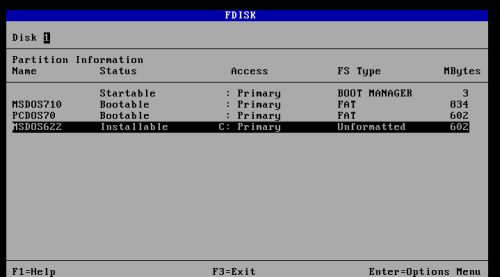
With removable media (the floppy drive) set as first boot device in BIOS, start the machine from the OS/2 2.1 diskette 0, and insert diskette 1 when asked to do so. On the Welcome to OS/2 screen, hit the ESC key to quit OS/2 2.1 setup and to go to the OS/2 command line. From here, start fdisk. To make the third DOS partition installable, select it and choose Set installable from the option menu. The screenshot shows the resulting partition layout, with drive letter C: now being assigned to the third DOS partition (to note that meanwhile I changed the boot manager partition names, that are now those corresponding to my actual installation...).
|
Start the computer from MS-DOS 6.22 installation diskette 1. After the Welcome screen, you are asked if you want to format the C: partition. This seems to be exactly the same as when we installed MS-DOS 6.22 before. But, it isn't at all. With now the third DOS partition having been set installable (all other partitions being invisible to the setup program), the drive letter C: is assigned to the last partition of the disk (that hasn't yet been formatted).
|
When rebooting after the installation is completed, MS-DOS 6.22 will show up, similarly as it did after having been installed in on the third partition. If you need a pause before we finish the configuration of our triple boot, good opportunity here to shut down the computer and (perhaps) enjoy a cup of coffee...
6. Configuring the OS/2 Boot Manager.
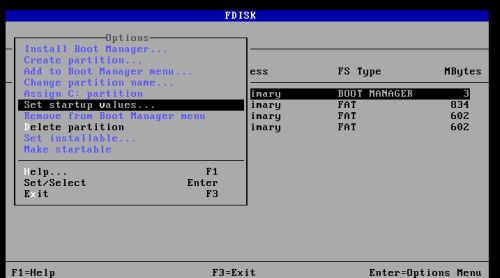
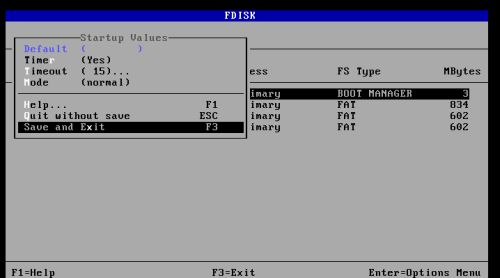
Start the machine from the OS/2 2.1 diskettes, go to the OS/2 command line and start fdisk. From the Options menu, choose Set startup values... (screenshot on the left). In the opening window, activate the timer and set a boot timeout value (i.e. the time that the boot manager waits before starting the default OS); I chose 15 seconds (screenshot on the right).
|
|
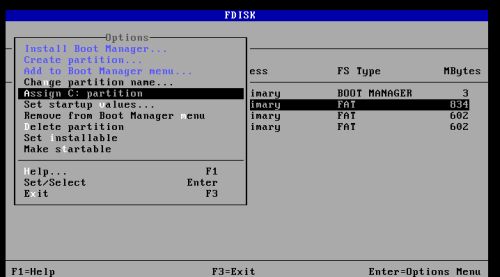
Now, lets set the default operating system. Select the partition of the OS that you want to be booted by default (MS-DOS 7.10 in my case) and from the Options menu, choose Assign C: partition (screenshot on the left). The screenshot on the right shows the final disk layout of the DOS triple boot installation on my VMware virtual machine.
|
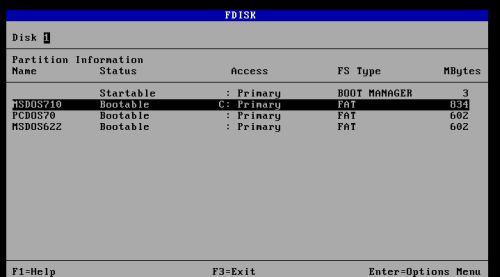
|
To save the settings and write the OS/2 Boot Manager into the MBR, hit the F3 key and in the opening window, choose Save and Exit. Remember that changing the drive letter will make pop up a warning message and that we have to press CTRL+ALT+DEL to reboot the computer. And, the floppy drive actually containing OS/2 diskette 1 (and not diskette 0) rebooting will result in a black screen with two OS/2 error codes. Just power off the computer.
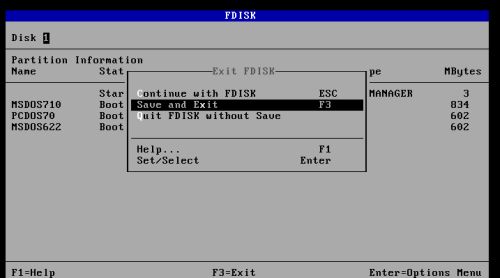
|
One last thing to do: Boot into the firmware and change the boot order in BIOS: Harddisk > CD > removable media. Now, powering on the computer will result in booting from the hard disk. The OS/2 Boot Manager will be loaded and the boot menu will be displayed. Use the up and down arrow keys to select the operating that you want to start and hit ENTER. That's it. Enjoy your DOS triple boot!
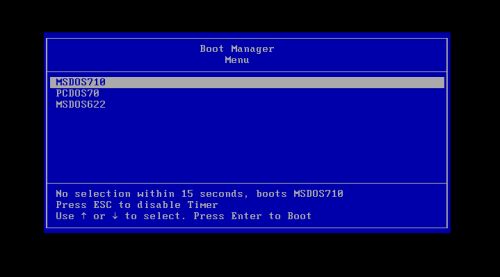
|
If you find this text helpful, please, support me and this website by signing my guestbook.