| InterBase distributions. |
|
"InterBase is an ultrafast, scalable and embeddable SQL database with top-of-the-line data security, instant disaster recovery, and unique, award-winning change
synchronization technology. With editions for mobile, desktop and server, InterBase gives multi-device, multi-platform apps a clear dependability edge and cost
advantage as you scale", they write at the Embarcadero (vendor of InterBase)
website.
|
|
There are several commercial InterBase distributions available: InterBase Desktop Edition, InterBase Server Edition, InterBase ToGo Edition. And there is the
free InterBase Developer Edition. To get it, visit the InterBase Developer Edition download page. You'll have to register (create an account) to download the software (don't worry, it's really all
free). After having done, you'll get an email with the serial number needed to install the application.
|
The Developer Edition has the following limitations:
- Limited to a maximum of 20 users (and 80 logical connections to the server).
- Limited to work only for 48 hours, after that time new connections are disallowed and you'll have to restart the server
I'm not sure if the terms and conditions of the Developer Edition allow to distribute applications using an InterBase database, or if it is for local development
only. If you intend to do so, be sure to read the licensing details!
|
|
This article is about my personal experiences, when trying out InterBase Developer Edition 2020 on Windows 11.
To note that this version of InterBase should also work on previous Windows releases, down to Windows Vista, and including Windows Server 2022 down to 2008 (!). It
is also available for several Linux distributions (RHEL 8, SuSE 11.3, Ubuntu 20, Ubuntu 18).
|
|
| Installing InterBase. |
|
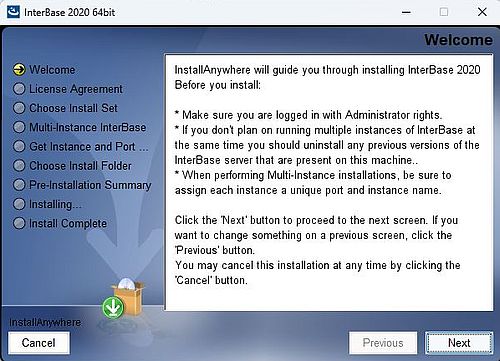
The download is a ZIP archive containing both the 32-bit and 64-bit installers. To install the 64-bit version, launch ib64_install.exe.
The screenshot shows the 'Welcome' window of the setup program.
|
|
|
|
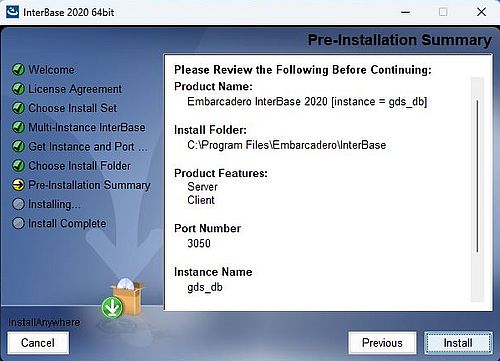
Setup of the software is a typical Windows wizard-based installation. Be sure to install the server and the client. Before file copy is started, a summary of the
installation options is displayed. Note, that the instance name is gds_db and that it listens on port 3050.
|
|
|
|
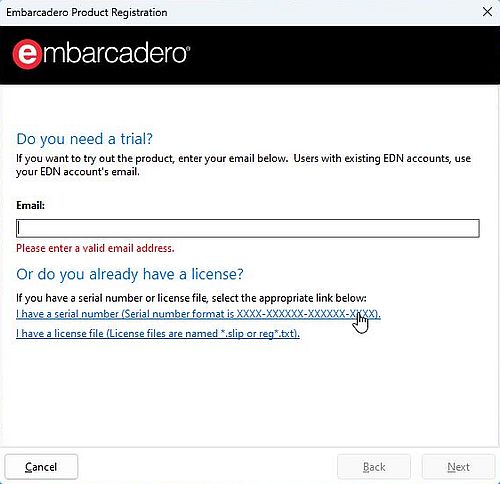
After the software has been installed, the registration process is started. To register the software, it is mandatory
to be connected to the Internet! From the available options, click the link I have a serial number.
|
|
|
|
In the Registration window, first fill in your email address and the password of your Embarcadero account, then fill in the serial
number that they sent to you by email. Push the Next button. The message "Thank you for using Embarcadero products" indicates that
the installation was all successful.
|
|
| Starting the InterBase server. |
|
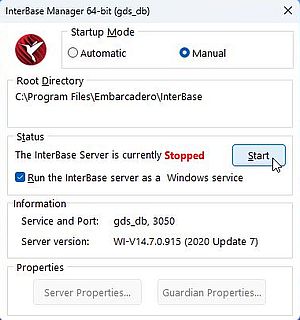
The installation files include the InterBase Server Manager that allows to manage the server instance. Change the startup mode to "manual"
if you don't want the server to start automatically with Windows. Use the button Start to start the server (the button caption then changes
to Stop).
|
|
|
|
| IBConsole: A full featured graphical InterBase client. |
|
The installation files also include client software. I think that there is a command line tool (similar to mysql.exe for MySQL); I did not try this out. In fact,
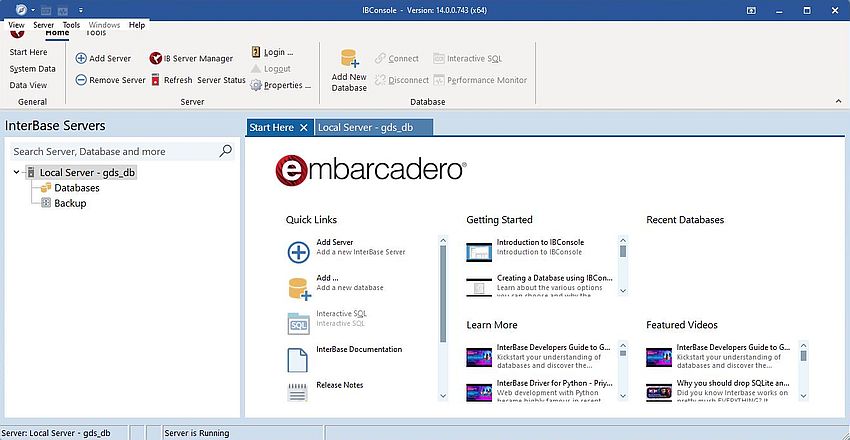
there is IBConsole, a GUI application, that includes everything that you need for server, database and user management, for creating
database objects, entering the data, running any kind of SQL queries. The screenshot shows the IBConsole homepage.
|
|
|
|
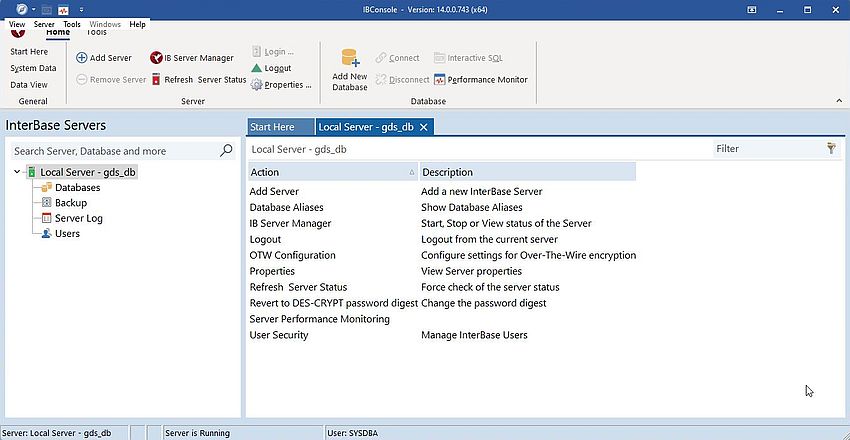
To connect to the local instance of the InterBase server, select gds_db in the left pane of the window, and choose Login... from the
icon bar at the top of the window. The login dialogbox pops up. Use SYSDBA as user name, and masterkey as
password. The screenshot shows the local server page after successful login.
|
|
|
|
Note: Maybe that I missed something, but I did not find any settings in IBConsole to change the password of SYSDBA (?). Is it
possible that the standard way to do consists in always running InterBase with SYSDBA using "masterkey" as password?.
|
|
| Creating a database user. |
|
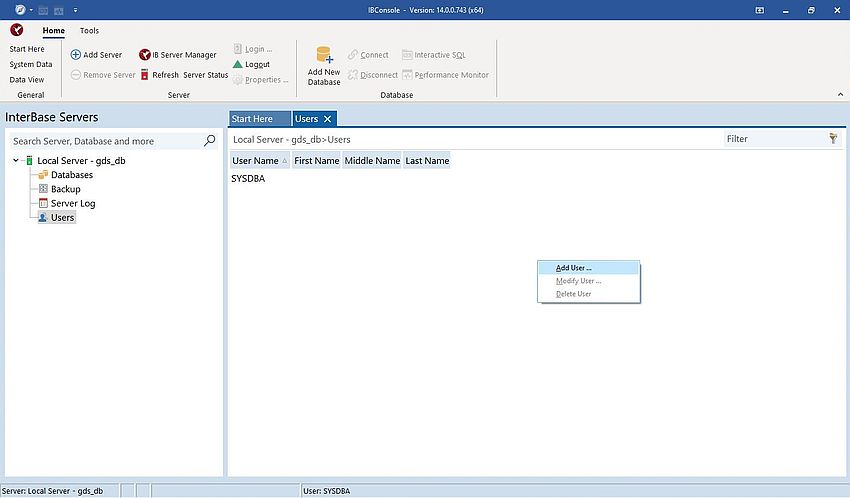
It is obvious that applications using an InterBase database must not connect as SYSDBA, thus, the creation of a less powerful user is mandatory. To create the
user ALLU (InterBase user names seem to be uppercase; when creating the user, lowercase letters are converted), choose Users in the
left pane of the window. The available users (SYSDBA, at this stage) are displayed in the right pane. Right-click into the right pane, and from the opening
context menu, choose Add User...
|
|
|
|
In the User Information dialog box, fill in the user name and a password, optionally the user's real name. Push the
Apply button: The new user will be added to the list of database users.
|
|
Note: For the rest of this text, we will always use the new user when logging in to the InterBase server...
|
|
| Creating a new database. |
|
On the Embarcadero website, you can find a several parts tutorial called InterBase Quick Start. Being written for the 2020 version, it not only shows how to use IBConsole to perform the different tasks concerning
the work with InterBase databases, but also is an excellent introduction to the SQL language. Highly recommendable for database newbies!
|
|
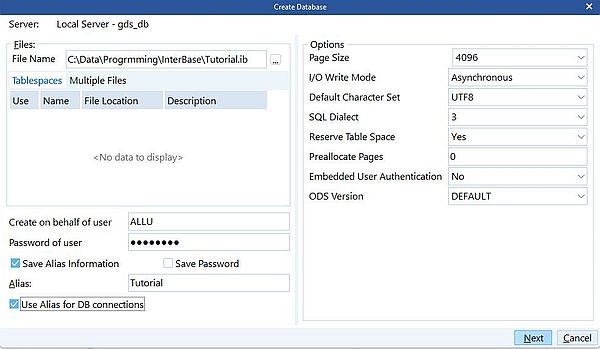
The database used in the rest of this text is the database "Tutorial" used in the Embarcadero tutorial. To create it, right click the local server item
Databases in the left pane of IBConsole and from the opening context menu, choose Create Database....
The Create Database windows opens. Use the "Browse" button next to the file name edit field to navigate to the folder, where
you want to create the database (I use C:\Data\Programming\InterBase), and create a file called "Tutorial.ib". Being logged in as ALLU, the database is
created on the behalf of ALLU, the database alias is set to "Tutorial". Enter your user's password, select the checkbox to save the alias. You may also
select the checkboxes to save the password and to use the alias for connection. On the right side of the window, you can specify the database options.
Most default values are all ok; setting the default character set to UTF8 is (probably) a good idea.
|
|
|
|
After the database has been created, the Database Connect dialog box opens automatically (to use the database in the future, log in
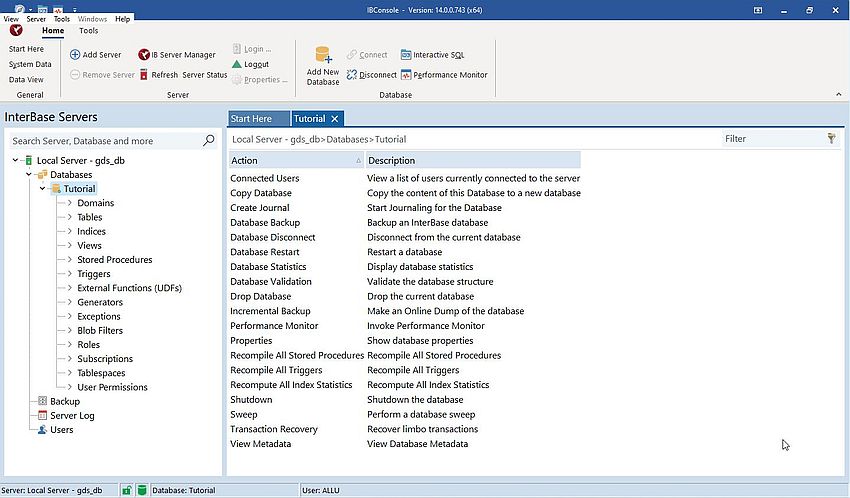
as ALLU, select the database "Tutorial" in the left pane of IBConsole and from the icon menu, choose Connect). The screenshot
shows the main page of the "Tutorial" database.
|
|
|
|
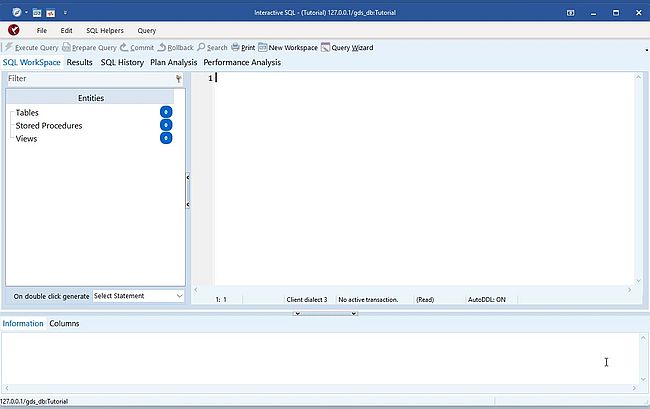
To work with the database (the one that you are connected to), choose Interactive SQL from the icon menu. This allows to directly
enter SQL statements, or to load SQL statements from a script file, thus as well to create the database objects, as well as to enter the database data.
Important to know that the changes to the database are only applied after the transaction has be committed. By default, the option "auto-commit" is set to
"on", thus if, for example, you create a new table, these changes are automatically applied to the database. However, "auto-commit" does
not apply to data related statements. This means that statements like INSERT,
UPDATE and DELETE are only physically applied to the database, after a manual commit has been performed.
You can to that by executing the SQL statement COMMIT, or by just running all your queries, and confirming to commit your work when you
are finished, a dialog box, that asks you if you want to commit or rollback the changes that you have made, being displayed when you quit
Interactive SQL or IBConsole. The screenshot shows the Interactive SQL page for the newly created "Tutorial"
database.
|
|
|
|
Before continuing, download the InterBase Quick
Start scripts from the Embarcadero website. Unpack the ZIP file to some folder...
|
If you are new to SQL, or if you want to enforce your SQL knowledge, I would suggest that you work through the Embarcadero "InterBase Quick Start" tutorial. The
alternative is to simply use the downloaded scripts to create the database objects and fill in the data. To execute a single SQL statement, enter it in the editor
window of Interactive SQL and choose Execute Query from the icon menu. To run a script, choose
Query > Load Script... from the IBConsole menu, then execute all statements at once. Some remarks concerning the InterBase Quick Start
scripts:
- When connected to the database in IBConsole, you don't need to provide any connection information, thus comment out the
CONNECT statement.
- If you choose not to follow the tutorial, be sure to uncomment those lines of the scripts, that have been commented because these
statements have been run by manually entering them as part of the tutorial.
- If you simply run the scripts without following the tutorial, your database will not be exactly the same as the one of the tutorial. This should not be an
issue for working with it.
|
To create the "Tutorial" database (without following the tutorial), proceed as follows:
- Run the script domains.sql to create the domains used in the table creation statements.
- Run the script tables.sql to create the tables.
- Alter the table "Department", as described on the
Creating Tables with a
Script page of the tutorial.
- Creating a separate tablespace for the table "employee", as well as creating further indexes is not mandatory to work with the
"Tutorial" database. If you want to perform these tasks, refer to the corresponding chapters of the tutorial.
- If you want, you can create the view "phone_list" as described on the
Creating Views page of the
tutorial.
|
|
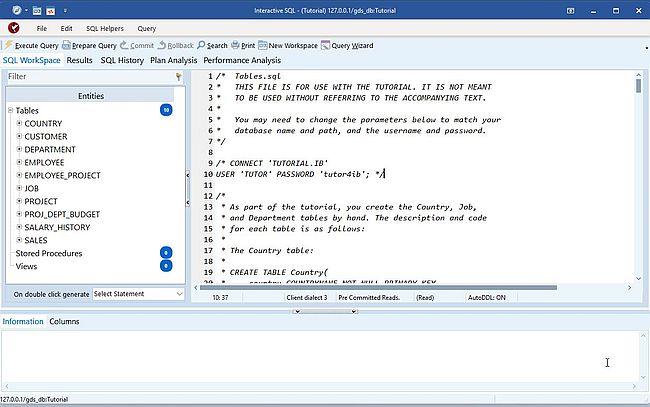
The screenshot shows Interactive SQL after I have run the script tables.sql (thus all tables of the database having been created). Have
a look at the SQL of the script in the editor. I have commented out the CONNECT statement. If you create the database without following
the tutorial, be sure to uncomment the table creation statements listed after "As part of the tutorial...", in order to create the tables "Country", "Job", and
"Department", that, when following the tutorial, have been created by manually entering the corresponding SQL statements!
|
|
|
|
| Filling-in the database data. |
|
There are several ways to fill the data into a database table, such as using the INSERT statement, or import the data from a CSV or
other file. In comparison with, for example, MySQL, the InterBase INSERT statement seems to have a rather annoying limitation: You
can only insert a single row of data (?), whereas in MySQL you can insert any number of rows with a single statement, separating the different
VALUES clauses by commas.
|
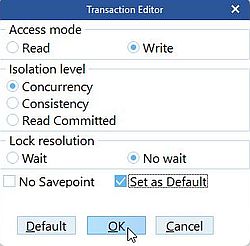
Also, important to know that, by default, InterBase transactions are read-only. Thus, before being able to use INSERT,
UPDATE, or DELETE, we have to set the transaction access mode to "Write". To do so,
choose Query > Options. In the Transaction Editor, set the following configuration:
- Access mode = Write (default = Read)
- Isolation level = Concurrency (default = Read Committed)
- Lock resolution = No wait (is default)
If you want, also select the Set as Default checkbox.
|
|
|
|
To fill the tables of our "Tutorial" database, we can run the two scripts inserts.sql and updates.sql, provided in the ZIP download from Embarcadero (the
insert script does not set the department managers; this is actually done by updates.sql). As with the other scripts, comment the
CONNECT statement off, and be sure to uncomment the statements, that have been entered manually when following the tutorial.
|
|
Remember that the changes to the database are only done after you have committed the transaction!
|
|
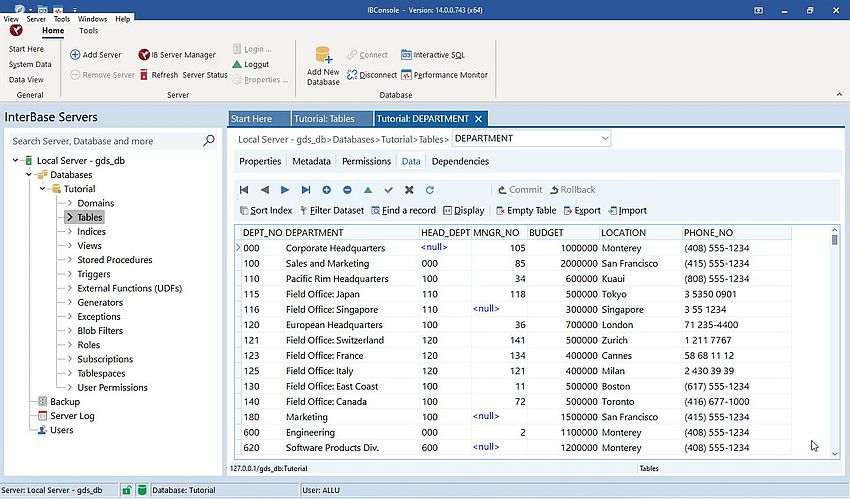
To display the table data, on the main database page, select Tables in the left pane, then double-click the table that you want to
view in the right pane. This will display the table properties (i.e. the table structure). To view the table content, open the Data tab.
The screenshot shows the data of the table "Department", after the department managers have been added.
|
|
|
|
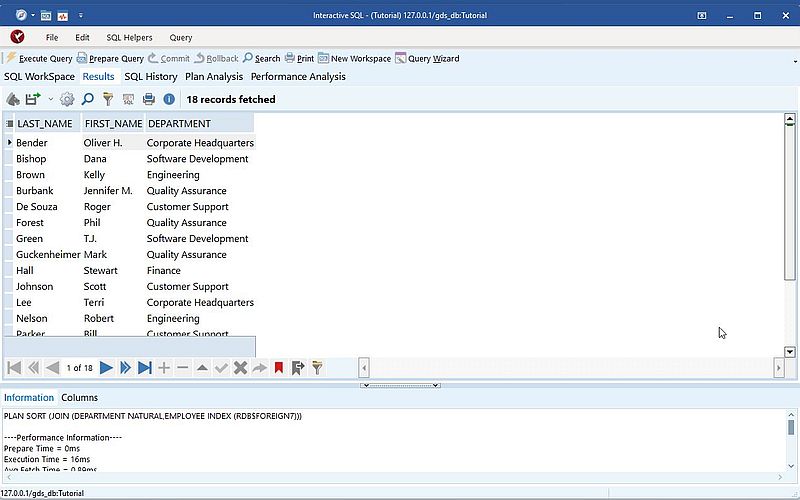
You can use Interactive SQL to run SELECT queries, i.e. searching the database for given data. As
example, here is the SQL statement to display the employees working at Monterey (where the society has several departments).
|
SELECT last_name, first_name, department
FROM Employee, Department
WHERE Employee.dept_no = Department.dept_no
AND Location = 'Monterey'
ORDER BY last_name, first_name;
|
|
The screenshot shows the query result (dataset returned by the query).
|
|
|
|
| Accessing InterBase from PHP. |
|
There are InterBase drivers available that should make it possible to connect to an InterBase database from a PHP script. Also possible that you can connect
using the Firebird PDO driver (?). I actually failed to get a connection; error message Unable to load dynamic library. The specified module
could not be found. Maybe that I missed something (?). Anyway, connecting using the ODBC driver works well (cf. further down in the text).
|
|
| Accessing InterBase from Perl. |
|
As for other database drivers, the installation of DBD::InterBase fails on my Strawberry Perl 64-bit. Here again, connecting using
the ODBC driver works well (cf. further down in the text).
|
|
| Accessing InterBase from Python. |
The Python module, needed to access an InterBase database, is called interbase, and you can install it using
pip. In Windows Command Prompt, enter
python -m pip install interbase
On my Python 3.13.2 (64-bit), it's interbase 1.0.1 that has been installed.
|
|
Trying to run my Python script however fails: The interbase module tries to import "utils" from "distutils", what doesn't work
because there is no module named 'distutils'.
|
Trying to install the module distutils, however, fails. The module is depreciated and has been removed from the Python distributions
later than 3.10. Installing the module utils succeeds, doesn't however resolve the problem. In fact, all this is not a big deal:
Simply install the module setuptools:
python -m pip install setuptools
|
|
Now we have all that we need to run the following simple command line script (that displays the number of records in the "Employee" table).
|
import interbase
db = interbase.connect(
host='localhost',
database='C:\\Data\\Progrmming\\InterBase\\TUTORIAL.IB',
user='ALLU',
password='allu',
sql_dialect=3
)
cursor = db.cursor()
cursor.execute("SELECT count(*) FROM employee")
count = cursor.fetchone()[0]
print("Number of employees in database 'Tutorial' = ", count, "\n")
db.close()
|
|
| Accessing InterBase from Lazarus/Free Pascal. |
|
| Accessing InterBase using ODBC. |
|
ODBC (Open Database Connectivity) is a technology that allows one to connect to a whole variety of databases using a single API, the ODBC API. There are ODBC
implementations for various platforms and there are drivers for most Database Management Systems. You can read some details about ODBC on Windows in the
second part of my tutorial Connecting to a MySQL database using Lazarus/Free Pascal.
|
|
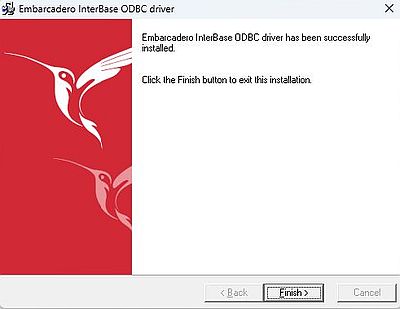
The download archive of InterBase Developer Edition includes the setup program for the InterBase ODBC driver. From the subdirectory "odbc"
of the ZIP content extraction folder, launch the program odbcibinstall.exe. Except for accepting the license agreement, no user intervention
is required. The screenshot shows the "Welcome" screen of the installation program.
|
|
|
|
On Windows, the configuration of ODBC, i.e. the creation of a DSN for a given database server, or a given database on a given server, is rather simple. Open
Control Panel and launch ODBC Data Sources (64-bit). This opens the ODBC Data Sources
Administrator, that allows you to easily create a DSN. Have a look at the Drivers tab. The InterBase ODBC
Driver should be listed there.
|
|
Return to the User DSN tab, and push the Add button. This will display a list of available ODBC drivers;
choose InterBase ODBC Driver and push the Finish button.
|
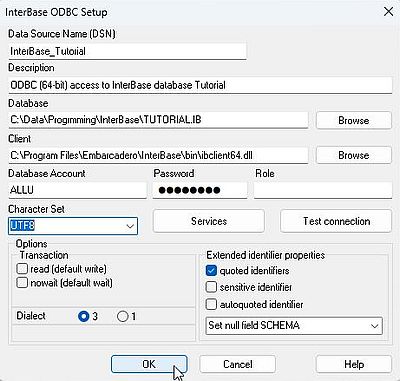
The InterBase ODBC Setup window is opened. Fill in the different edit fields as follows:
- Data Source Name: Name to be used in the database connection string to identify this DSN; I chose "InterBase_Tutorial"
- Description: Optional description of the DSN
- Database: Full path to the concerned database (in my case: C:\Data\Programming\InterBase\TUTORIAL.IB)
- Client: Use the Browse button to navigate to the "bin" folder of the InterBase installation directory,
and choose the file ibclient64.dll.
- Database account and password: Database user name and password, as created at the beginning of this text.
- Character set: As we set the character set of the "Tutorial" database to UTF8, we should do this here, too (?).
- For all other edit fields you can let the default values; just be sure that the dialect is the same as the one set when creating the database (with the
2020 version, dialect = 3)
|
|
The screenshot shows the DSN for our "Tutorial" database, with all configuration values filled-in.
|
|
|
|
Before trying the DSN from one of your applications, you should test the configuration right here in the ODBC Data Sources Administrator.
Pushing the button Test connection should result in a dialog box that displays the message "Connection successful!".
|
|
Using the ODBC driver with PHP.
|
One of the advantages of using ODBC is that the required ODBC module, extension, or whatever it is, is installed by default when installing a given programming
language. Thus, no need for any downloads or supplementary installation. All we have to do to use ODBC with PHP is to enable the ODBC extension
in PHP.INI. Do that by uncommenting the following line
extension=odbc
Forgetting to do so will result in the error message Undefined function odbc_connect() when running your script.
|
|
Here is a simple PHP command line script that tries to connect to the "Tutorial" database, displaying a success message if all is ok, an error message otherwise.
The script works correctly with PHP 8.2.28.
|
<?php
$dsn = 'InterBase_Tutorial';
$conn = odbc_connect($dsn, '', '', SQL_CUR_USE_DRIVER);
if ($conn) {
echo "Connection to database 'Tutorial' successful!";
odbc_close($conn);
}
else {
echo (die(odbc_error()));
}
?>
|
|
Note: If you look at the code, you notice that empty strings have been used as user name and password. What happens in this case
is that user name and password will be taken from the DSN; thus, the connection will succeed. Using the (correct) user name and password works, of course, too.
If you specify a bad user name and/or password in the script, the correct value in the DSN will be overwritten and the script aborts with the error message
User name and password are not defined (what means that there is no user with this password configured to have access to the database).
|
|
Using the ODBC driver with Perl.
|
|
The module DBD::ODBC is installed by default with Strawberry Perl; thus, nothing further to do in order to access an InterBase database
using ODBC from a Perl script.
|
|
Here is a simple Perl command line script that displays the number of records in the "Employee" table. The script works correctly with Strawberry Perl 5.38.2.
|
use strict; use warnings;
use DBI;
my $driver='Interbase ODBC driver'; my $database='Tutorial'; my $username = 'ALLU'; my $passwd = 'allu';
my $dbh = DBI->connect("dbi:ODBC:driver=$driver;Database=$database", $username, $passwd, { AutoCommit => 1, RaiseError => 1 })
or die "Failed to connect to database: $DBI::errstr";
my $sql = "SELECT count(*) FROM employee";
my ($count) = $dbh->selectrow_array($sql);
print "Number of employees in database 'Tutorial' = $count";
$dbh->disconnect();
|
|
Note: I'm not sure if this is the "standard" way to use Perl with ODBC. In fact, if you look at the code, you notice that this is
different from the usual way to work with ODBC. The connection string does not contain a DSN, but the name of the
ODBC driver to be used. I suppose that the DSN is not used at all in this case (?). As a consequence, all connection settings have to be done in the script,
in particular, you'll have to specify the user name and password. If you use empty strings, the script will abort.
|
|
